

Wow, vacuum ovens are sure neat, albeit expensive for a new one and the old used ones frequently can't hold the temperature in the low ranges that we use for purging and refining cannabis essential oils. What to do?
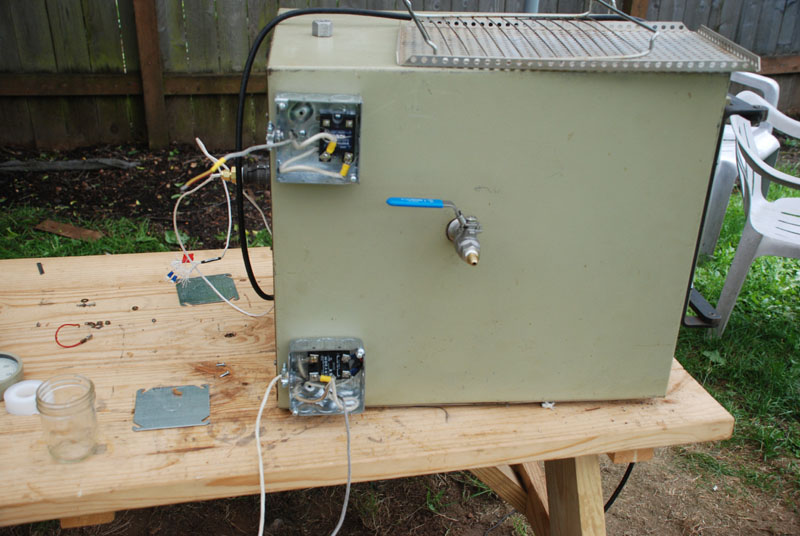
A simple vacuum pot sitting on a hot pad does the trick, so our inclination to spend much money was low, and we decided to refurbish a used Napco 5851 vacuum oven, which we scored for $550.
As received, it wouldn't hold within -7F/+60F of the 115F set point, so I first replaced the capillary tube type thermostat with a Panasonic AC100 self teaching Temperature Controller, in conjunction with a Type K thermocouple. To my chagrin, while that helped, the temperature still swung wildly, because of the overall oven design.
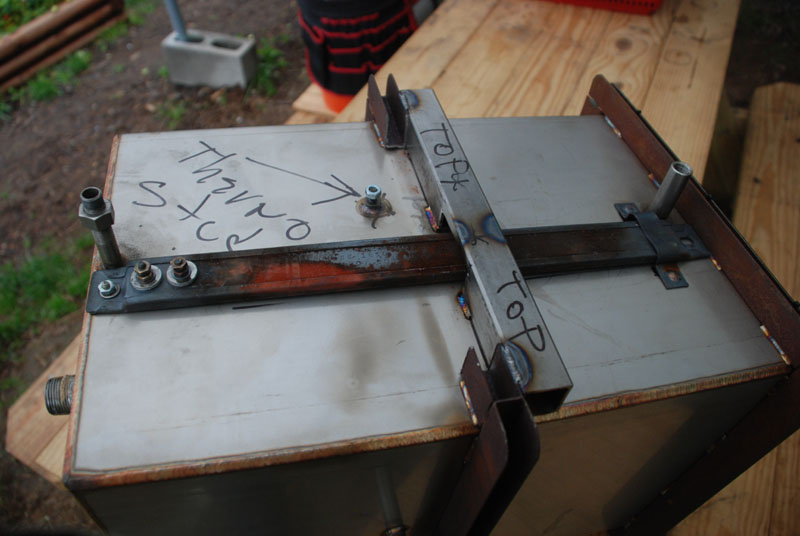
The Napco oven is a simple vacuum can, wrapped in insulation, with an outer metal surround. The inner can has two 500W strip heaters bolted to the bottom, and they heat the entire can through convection. That clearly leaves a wide disparity in temperature within the oven, plus the inertia of the two 500W heaters significantly overshoot the upper control end.
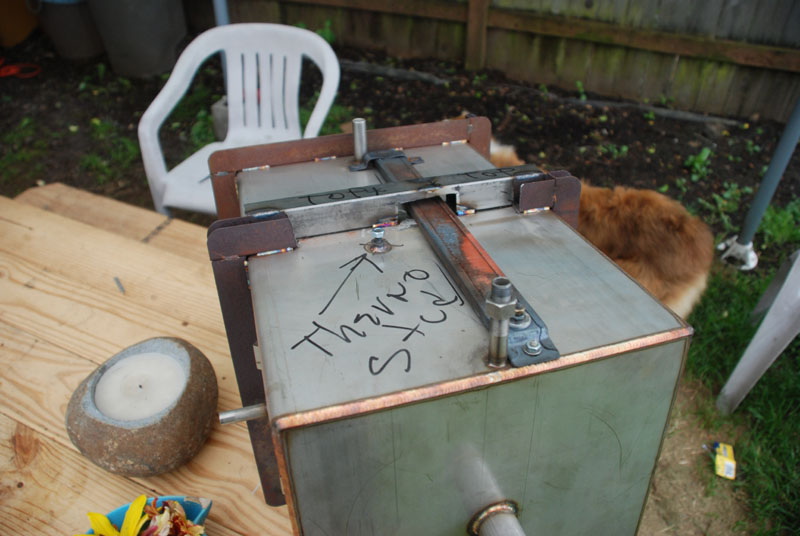
Soooo, I took the oven completely apart, and after replacing the stiffeners that were in the way, I relocated one 500W heat strip to the top of the oven and centered the remaining one under the bottom. I added Type K ring thermocouples to the upper and lower can surfaces, and added another Panasonic AC100 to control the upper heating element.
I inserted my first Type K thermocouple into the center of the oven, through a compression fitting in the rear oven port, but left it to just hang at this point.
In both cases, I added Crydom solid state relays, to control the oven current with the low Panasonic controller voltage.
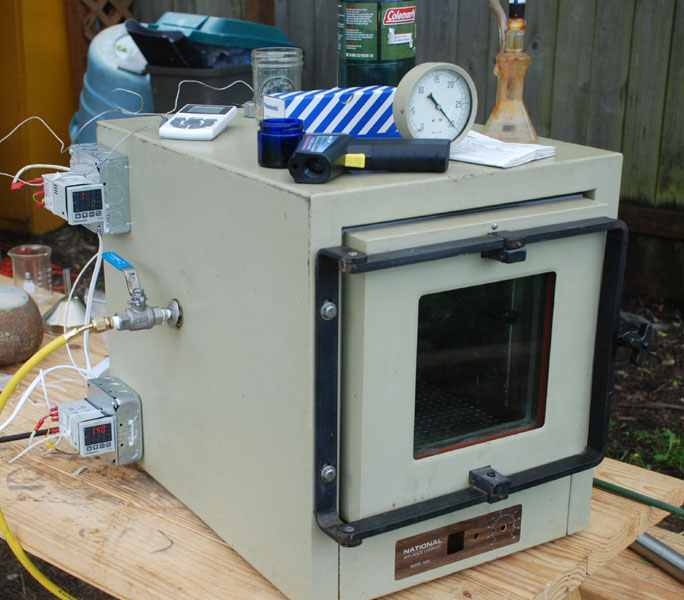
Alas, still too much heat strip inertia to control at 115F, so next I disconnected the upper heat strip completely, and hooked the thermocouple in the center of the oven to the Panasonic controller, in read only mode.
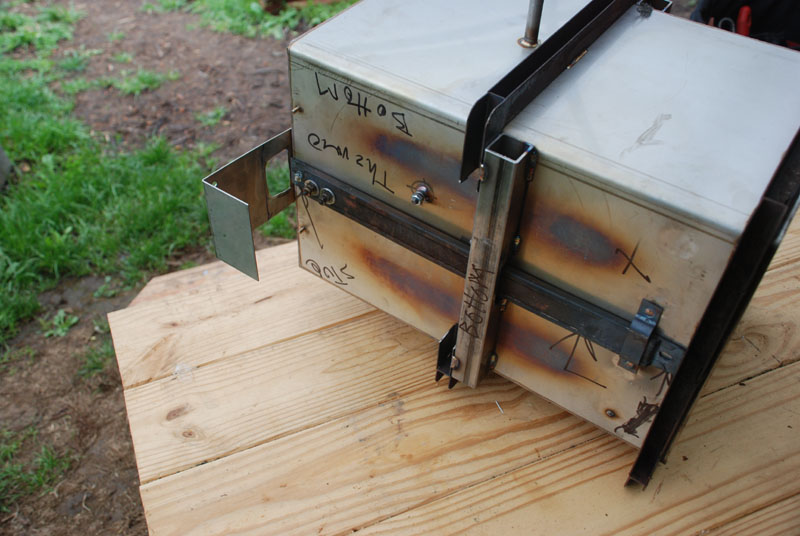
Finally I was able to control the oven in the 85F/115F range that we were shooting for, so next I will pick up a nice box for the two Panasonic controllers and finish up the oven. In addition to using one controller to run the lower heating element, and the other to read out the actual inside oven temperature, I will add individual switches to the upper and lower heat strips, so that I can switch one or both on or off at will.
That will allow me to use the upper heating element to speed up startup, and switch it off during actual processing.
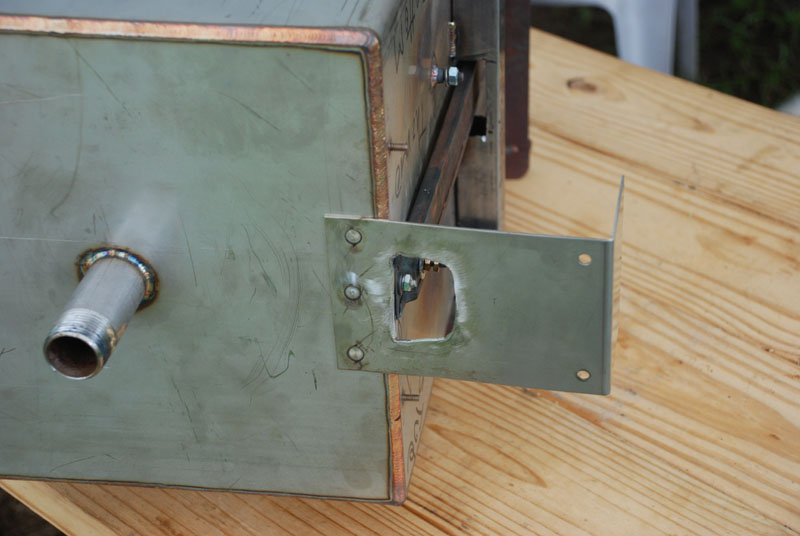
Here are some pictures. I will follow up when we complete final packaging.
I'm looking for a power switch for my 5851. Does anyone have a clue about where to find one?
Can you use Mild steel to build a chamber? I have a heraeus 5042 Oven. Now its not designed to hold vacuum so i want to build a new chamber to put inside and remod the door to seal properly. Or should I go with SS304? And what thickness is good enough? Thanks
Mild steel is strong enough, but if you use stainless you don't have to worry about finishing the inside so it doesn't rust. I would use 10 gauge 304L for the shell,with a mild steel tubular frame on the outside for stiffening.
Hey there GW! partner and I just scored a mint conditionoven for $100! It's pristine aesthetically, and seems to be in full functioning order. (Holds vacuum, heats up, yadda yadda) Sweet deal! It's a NAPCO 58501 875 watt, that from the outside, to our very untrained eyes looks identical to yours except for the controls on the front. My search had turned up no manual or literature on this model. My question for you is: do you have any insight in this particular model and how it could be used/modified to work for our purpose? you Danny
Hello, I'm interested in the homogenization process and what mix of VG and BHO is used in the emulsion, is this information available?
Still experimenting with that. More after next test to determine the upper limits.
sorry to revive a old post, i just got a napco 5850 and i want to rebuild it with digital controls as well. im making up a parts list so far ive got 2 controllers, 2 soild state relays, new ring thermocouple, am i missing anything? thanks for the help i think this will work great for my 5850 rebulid
Sounds like you've got it covered. I relocated the heating strips, and you might consider replacing the 500 watt strip heaters with 250's and put one on all four sides.
Help! I'm stuck and can't figure what to do next on my MK v. Who can I contact? Is there a ph number for skunk wrkx to get help!!!!!
Graywolf@skunkpharmresearch.com, or take your luck catching him at our office at 503-287-1384.
Big thanx to you! Really appreciate your guys response. Think i finally figured out how to piece it together 😊. I realize I could really use going to one of your training classes! Lol! Merry Christmas to you and yours, and a happy new year. Blessings
Same too ya bro! Ohmmmmmmmmmmmmmmmmmmmmmmmmmmmmmmmmmmmmmmmmmmmm!!!!!!!!!!!!!!!!!!!1
I will be coming out to class next year. Please post schedule when u know it. Thanks
Great work @ Skunkpharm. I can't wait to come down and learn all i can next year. I'm really excited to see what your results are with the homogenizer before i buy one..... I have been thinking about it for a while.....finally without separation!
I had the privilege of trying out some of Joe's work. You can pretty much guarantee it tastes as good as it looks. Keep up the good work guys!!
Thank you kind sir!
woot woot its going down in the Pharm!!!!! :) hope you all had a safe aand happy holiday :) loving all the new stuff!!! thanks again for the help i got it worked out to a wayyy better degree now :)
Can't wait to get my hands on a copy of this video :D Very interesting read and wow at that guys 12% Yeild picture damnnnnnnn i wish i was him right now! Look forward to my march issue of HT as well cant wait to see what you guys accomplished :D Keep doing you!
Hey Skunk Pharm Research; Were really excited that Dr Robert Melamede will be working along beside you as you bring us more of your wonderful delights from The Mk IVA and Mk V. Were looking forward to seeing what the New Year brings. Say viewers of Skunk Pharm Research LLC be sure and drop by the Skunk Pharm Research LLC Facebook Page https://www.facebook.com/SkunkPharm And add your likes, see updates before others and add your comments.
The lecture was very interesting to say the least. Even if some of DR. Fischedick's research was a tad "over my head"@ times,...incomplete, or what ever your opinion was. It was certainly worth my time! It was also clear that the same hard core research being done in Amsterdam...is also being done NOW in Portland, Oregon. Hee he Always a pleasure to spend time with Carla,GW & Joe. Thanks again for your hospitality. Oh btw...Dr Fischedick was a bright & handsome young lad. As was his gorgeous partner. With her background being in "Alkaloids". Someone pleeeese tell me when that class will be. Otherwise I hope to see you folks for Dr Robert Melamede's class & already know I'll get to see GW @ the High Times Cup in Feb........arwwwwooooo!!!
any experience with gravity convection vac ovens?
Sorry no. I've actually never heard of convection in a vacuum, so you have my interest.
Recently got a used VWR 1410 oven for fairly cheap, only problem is it has a noticeable amount of 'chemical dirt' inside and on the rack. Any tips on cleaning it and the smell up?
I infer that it has a stainless steel liner and a glass front. The fastest way to clean the stainless liner, regardless of what is on it, is plain old emery cloth. Wear a respirator if you don't know what the baked on chemicals are. Just polish it up, and the contaminants will come off. Use glass cleaner and soft scrubber on the glass. I picked up new stainless racks that fit ours from Goodwill. If you want to salvage yours, I would start by soaking the rack in hot soapy water and use a stainless sidewall brush to clean off what will come off. I would then soak it in a strong solvent like acetone or MEK and brush it, to see what will come off. Next you can soak it in an acid like Muriatic acid to remove what is left, followed by a strong base rinse, such as NAOH or KOH (Draino). You can also run it through a conventional oven during a 750F cleaning cycle, to reduce any organics to CO2 and water vapor. You will probably have to replace the silicone rubber door gasket, as you don't know what it might be soaked with.
I bought a napco but the gasket on the door seems to leak do you have any suggestions on buying or building one?
Well same problem with me so i took out the gasket and added a layer of 100% silicone froma caulking tube from Home Depot and allowed it to cure . Cleaned it up and reinstalled and I then attempted vacuum and it was much better but it still leaks slowly so i must keep pump on .\new one is on my list, lot of work in rebuilding one..
is there much advantage to using a vac oven versus a diy vac setup like your other thread? it seems like being able to use multiple racks within the oven would be fantastic, but most ovens only use bottom heat. on my diy setup, i use a presto grill with a large pan of water on it. i use glass marbley things that are flat on one side to elevate my vac pot and use a Ranco ETC-111000 to control the temp of the water bath. i can keep it within 1 degree of my set point.
Multiple racks sounds like a better idea than it actually works out to be, because of the need to watch what is going on. An oven has more even heat top and bottom than a chamber and ours will hold larger Pyrex trays. Both work slick!