BUILDING YOUR OWN DRY SIEVE FRAMES AND HARVEST BOXES INEXPENSIVELY
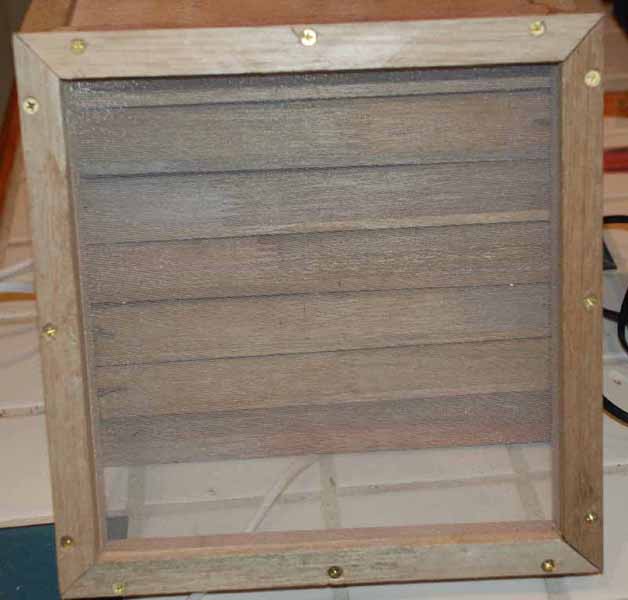
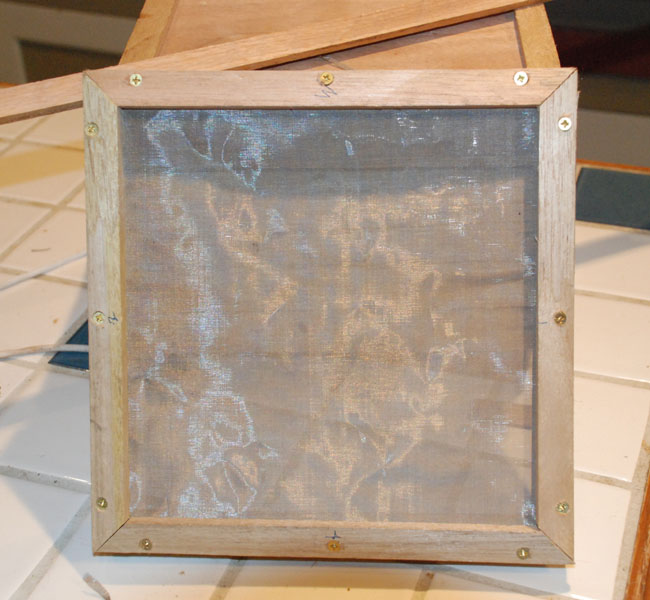
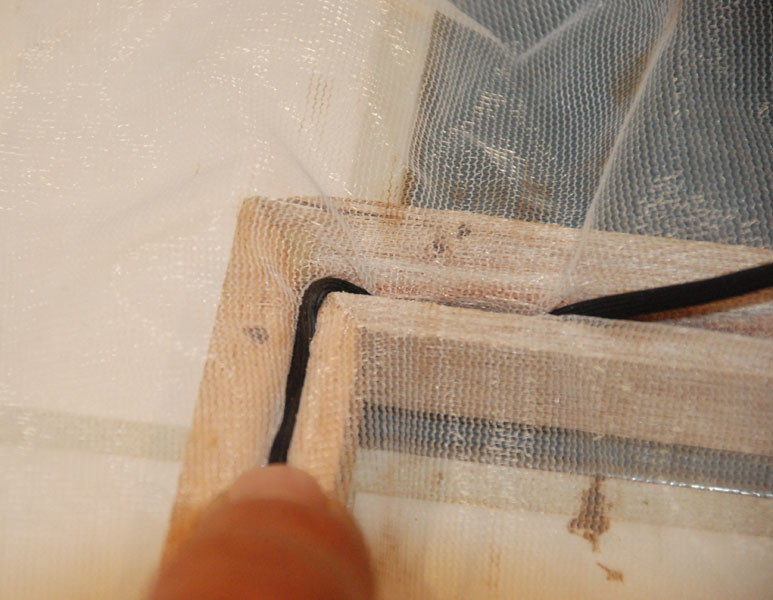
For those of ya'll who like to sieve by hand, or to further refine dry sieve by re-sieving it through different size meshes, here is a simple frame that will accommodate either a stainless mesh, or permit a silk screen fabric to be rolled in and properly tensioned with a spline.
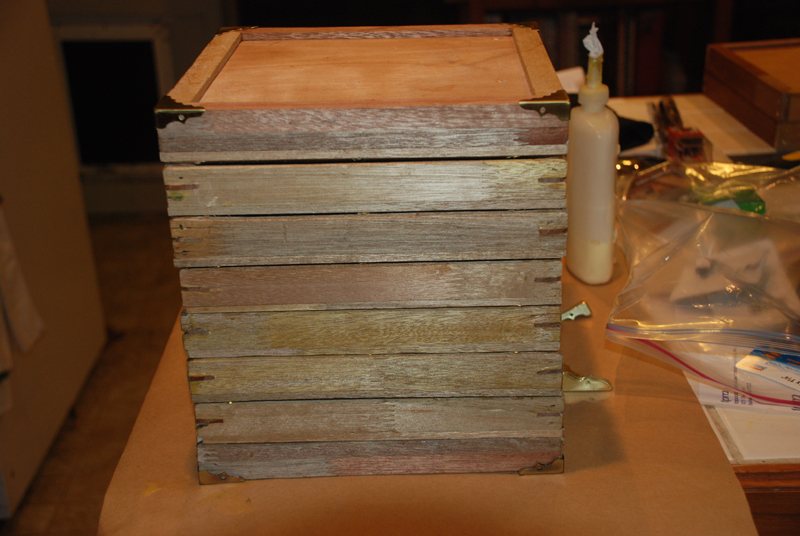
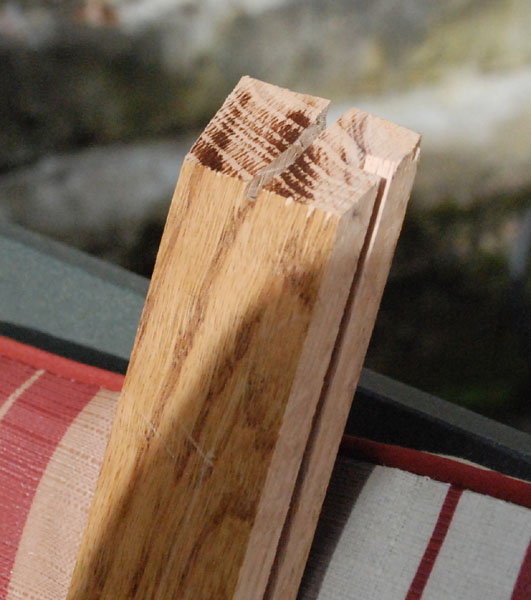
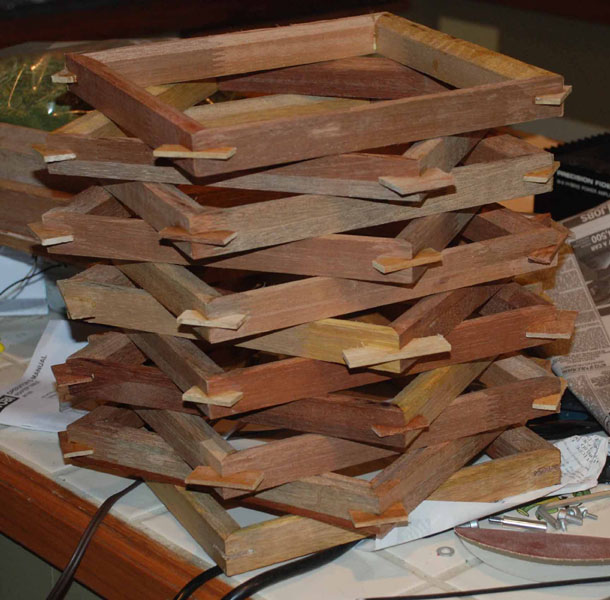
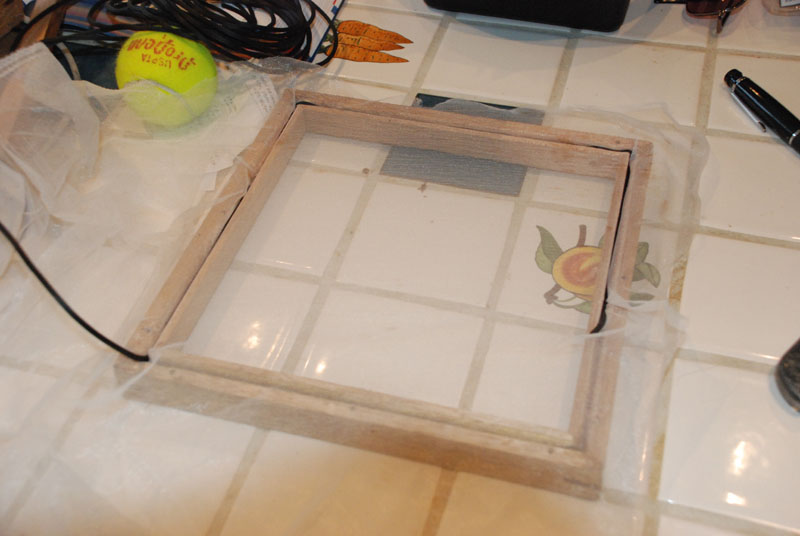
The retaining strips, that hold the silk screen spline or stainless mesh in place, are cut at an angle, which matches the angle cut in the top of the frames, so that after assembly, they conveniently nest for storage.
Costs:
Cost per frame for the wood depends heavily on what you pay for your wood. In the examples shown, I picked up 8' finger grooved mahogany trim from a lumber re-cut liquidator, for $0.99 a stick, so lumber cost was about $0.50 per frame.
I prefer a hardwood, as they are less prone to splitting and hold dimensions like groove width over time. It doesn't matter what kind, and I've cut up free for the hauling hardwood pallets to make hardwood parts.
Equipment:
The whole frame can be cut out using just a table saw. I build mine on a cheap $200 fold up portable that I picked up at Home Depot, when I got tired of hauling my big cast iron 240V Craftsman around for rental repairs. It came a 1/8" wide carbide blade, which is what I used to make all of the pieces.
I wouldn't want to build a house with it, but for trim and such, it is excellent.
Safety:
Before we move on, lets discuss safety. If you are unfamiliar with the safe operation of a table saw, please seek hands on instructions. Besides being a dear friend and cherished tool, they instantly remove digits, so must be used concisely and with respect. Wear safety goggles and use a pusher stick, in addition to the fence and slide.
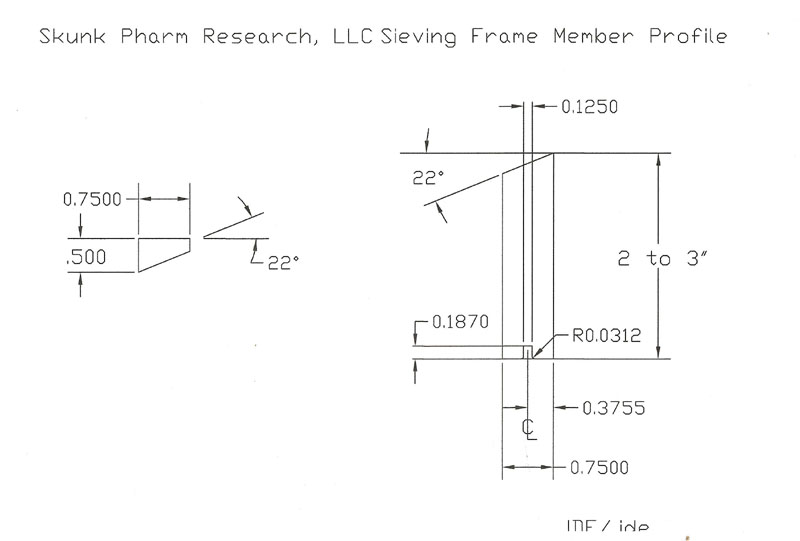
The profile:
Cutting frame and retaining strip:
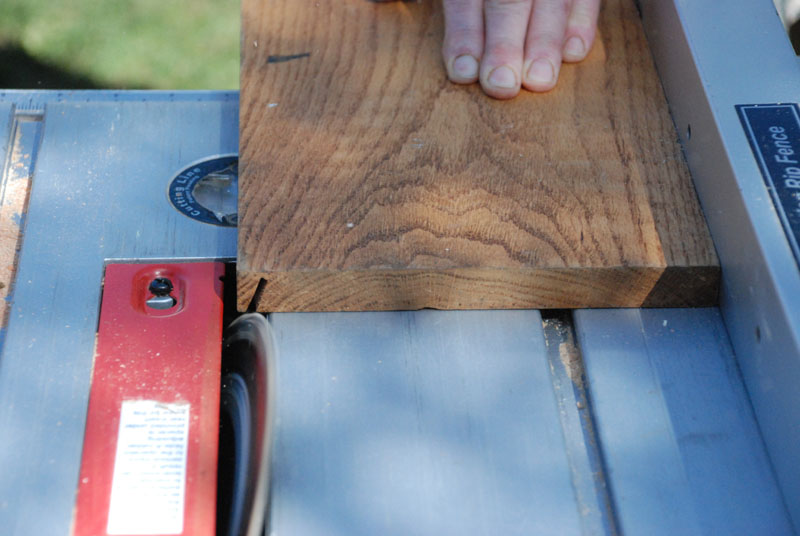
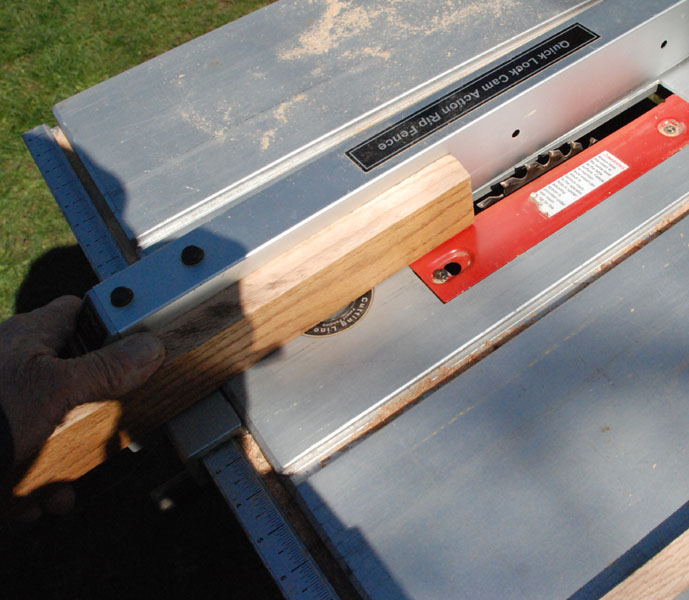
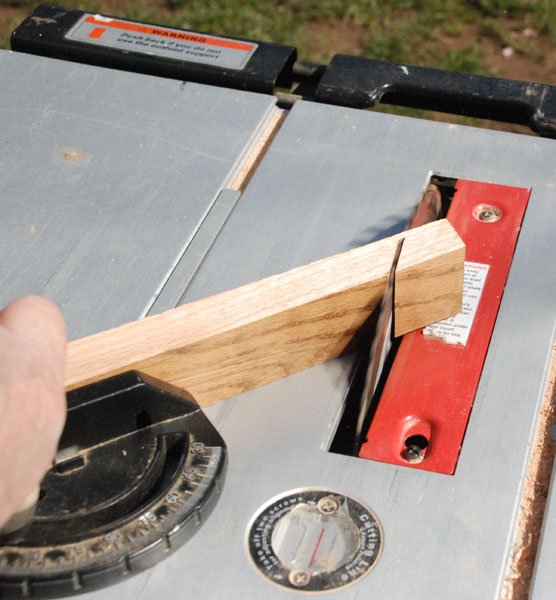
The first cut is the 22 degree angle in the top for the nesting feature. For this cut, I use the fence and a pusher stick to feed the stick through the saw.
The piece that is cut off in this cut, is the same piece that the retaining strips will be cut from and screwed on to the bottom.
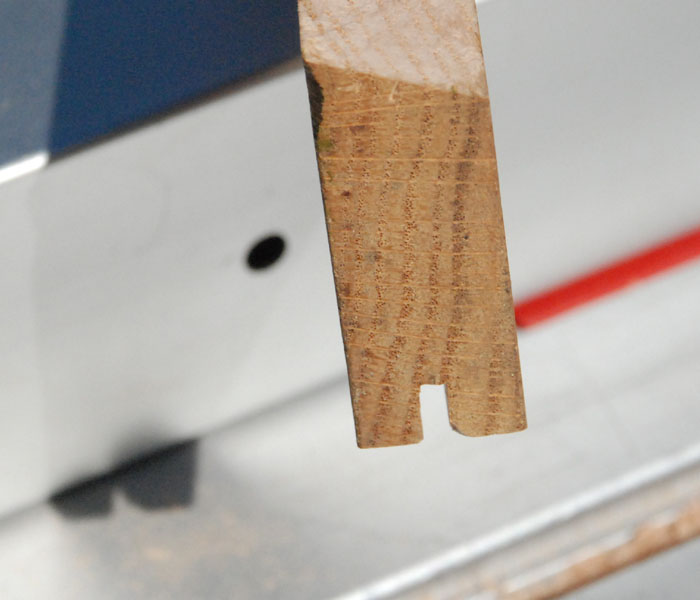
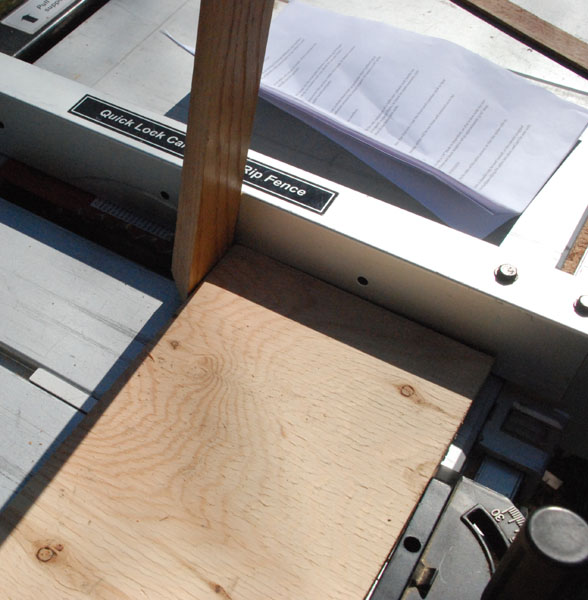
Next the groove for the spline is cut into the bottom, and here is why a 1/8" blade is important, as that is how wide the slot is. The groove is centered in the bottom of the board using the fence and blade height is set at approximately 3/16" deep
The frame board profile is now complete, except for radiusing the sides of the spline groove, so that the spline rolls in smoothly.
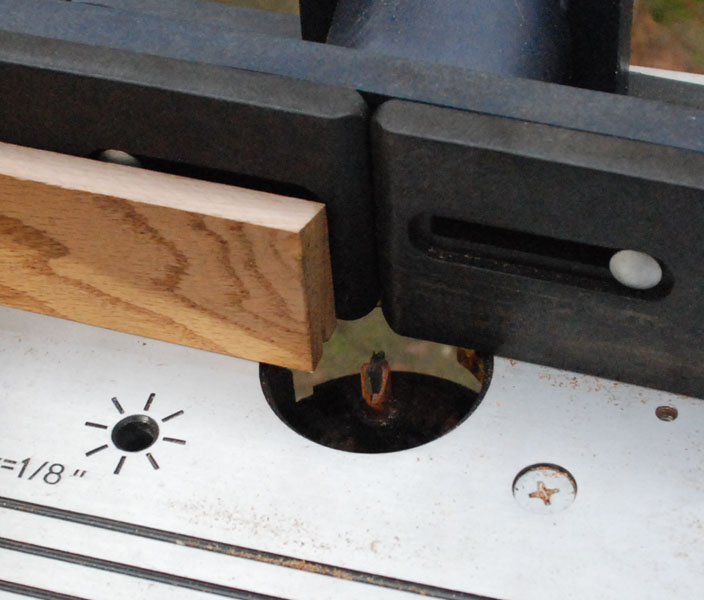
I use a router in a stand to radius the sides of the spline grove. A chamfer may be used instead, or the corners scrapped away with a sharp blade, instead of routed. The purpose is to facilitate rolling the spline into place, and can't be seen with the retaining strips installed.
Once the profiles are all cut, it is time to cut the parts to length. The ones in the pictures are 1 1/2" deep X 10" X 10" screens, but I prefer a 12" X 12" X 3", which is what the attached print was designed for.
There is nothing magic about any dimension, only the nesting feature and the spline slot to proportionally locate.
Next step is to cut all the parts to length. That is easy, because they are all cut to the same length and at a 45 degree angle. A miter saw is faster and easier for this step, but it is also easily accomplished using the miter feature on the table saw slide.
Last, cut on the frame members, is to cut an 1/8" X 3/4" deep slot in the center of each end, for the wooden keys that we will lock the corners with, during gluing.
The retaining strips are then cut to exactly the same length as the frame parts, and three holes drilled and counter sunk for #4 screws in them. There is one hole 1 1/2" from each end, and one exactly in the middle.
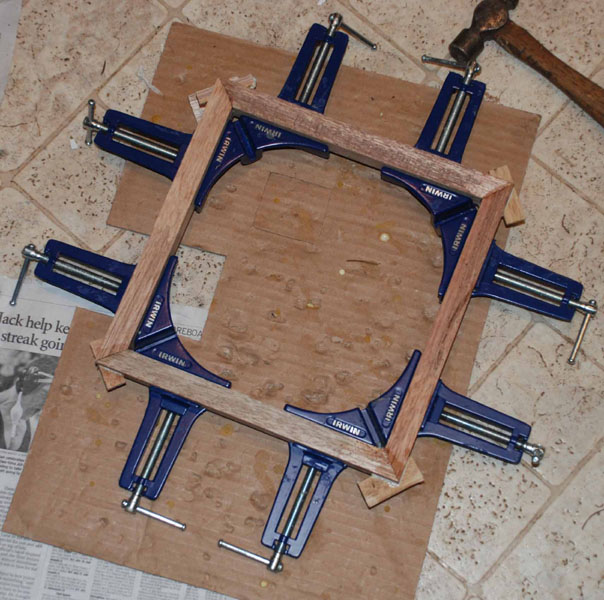
After any light sanding required, we are now ready for assembly! For this purpose, I use corner clamps and after smearing the ends with Elmer's glue, I clamp them together and drive in the corner keys.
I clean any glue out of the spline channel, before it hardens.
When the glue dries, I trim away the excess corner key with a razor knife.
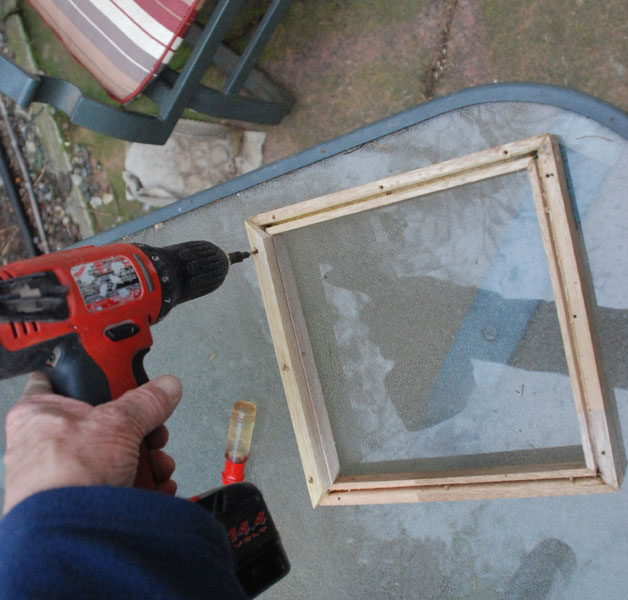
Next I use a countersink bit to pre-drill the holes for the retainer stips, so the screws install easily.
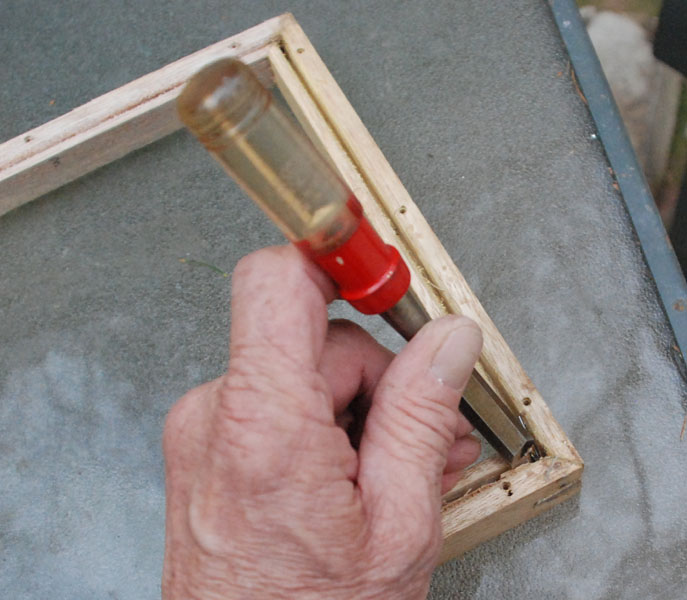
Lastly, I chamfer the inside corner of the spline channel with a sharp wood chisel.
Choosing a screen material:
Frame is now ready for assembly and how we do that, depends on how it is to be used. If it is to be used for primary sieving, or as a harvest screen to handle your material on, then you may wish to use a stainless mesh, that is durable and easy to clean.
If on the other hand, you wish to further refine the previously extracted kif, a silk screen is a better choice, because it can be stretched taughter, giving it a better spring action.
Some silk screen material is woven with single monofilament threads, and some are made of threads comprising multiple twisted smaller fibers. For sieving purposes, we want a monofilament, as the opening sizes between the threads are more consistent, and they don't fray fibers into the kif.
Choosing a micron size:
The correct micron size depends heavily on the task, so more than one sieve size is called for.
Initial sieve:
For an initial dry sieve, 130 to 150 micron has worked out well for us and we prefer stainless steel for this task.
We use 100 mesh stainless steel bolting cloth from Howard wire. Our last bulk purchase was about $6.50 ft/sq, but metal prices are volatile, so check for current pricing.
We like stainless because of the durability, and the harsher treatment that it sees, than the latter sieves refining and classifying the kif afterwards.
150 microns is adequate for most mature trichome heads, and not so large as to permit entry of larger plant particle sizes.
Refining and classifying:
Once the kif has been separated from the plant material, you may wish to separate it further, to eliminate immature kif heads and plant debris. This is done by passing it through successive smaller mesh sizes, so that you have several different grades.
If I re-sieve, it is typically at about ~130, 110, and 75 microns, and I pitch anything above 130 and make oil out of anything below 75 microns. That gives us two prime grades left on the 110 screen and left on the 75 micron screen.
Each strain has its optimum sieving sizes, so experimentation is the best way to zero in. A quick way to shorten the experimentation time, is to measure the trichome heads first using an optical comparator. Here is an inexpensive portable microscope that I picked up off of E-Bay, which has an optical scale on the eyepiece. 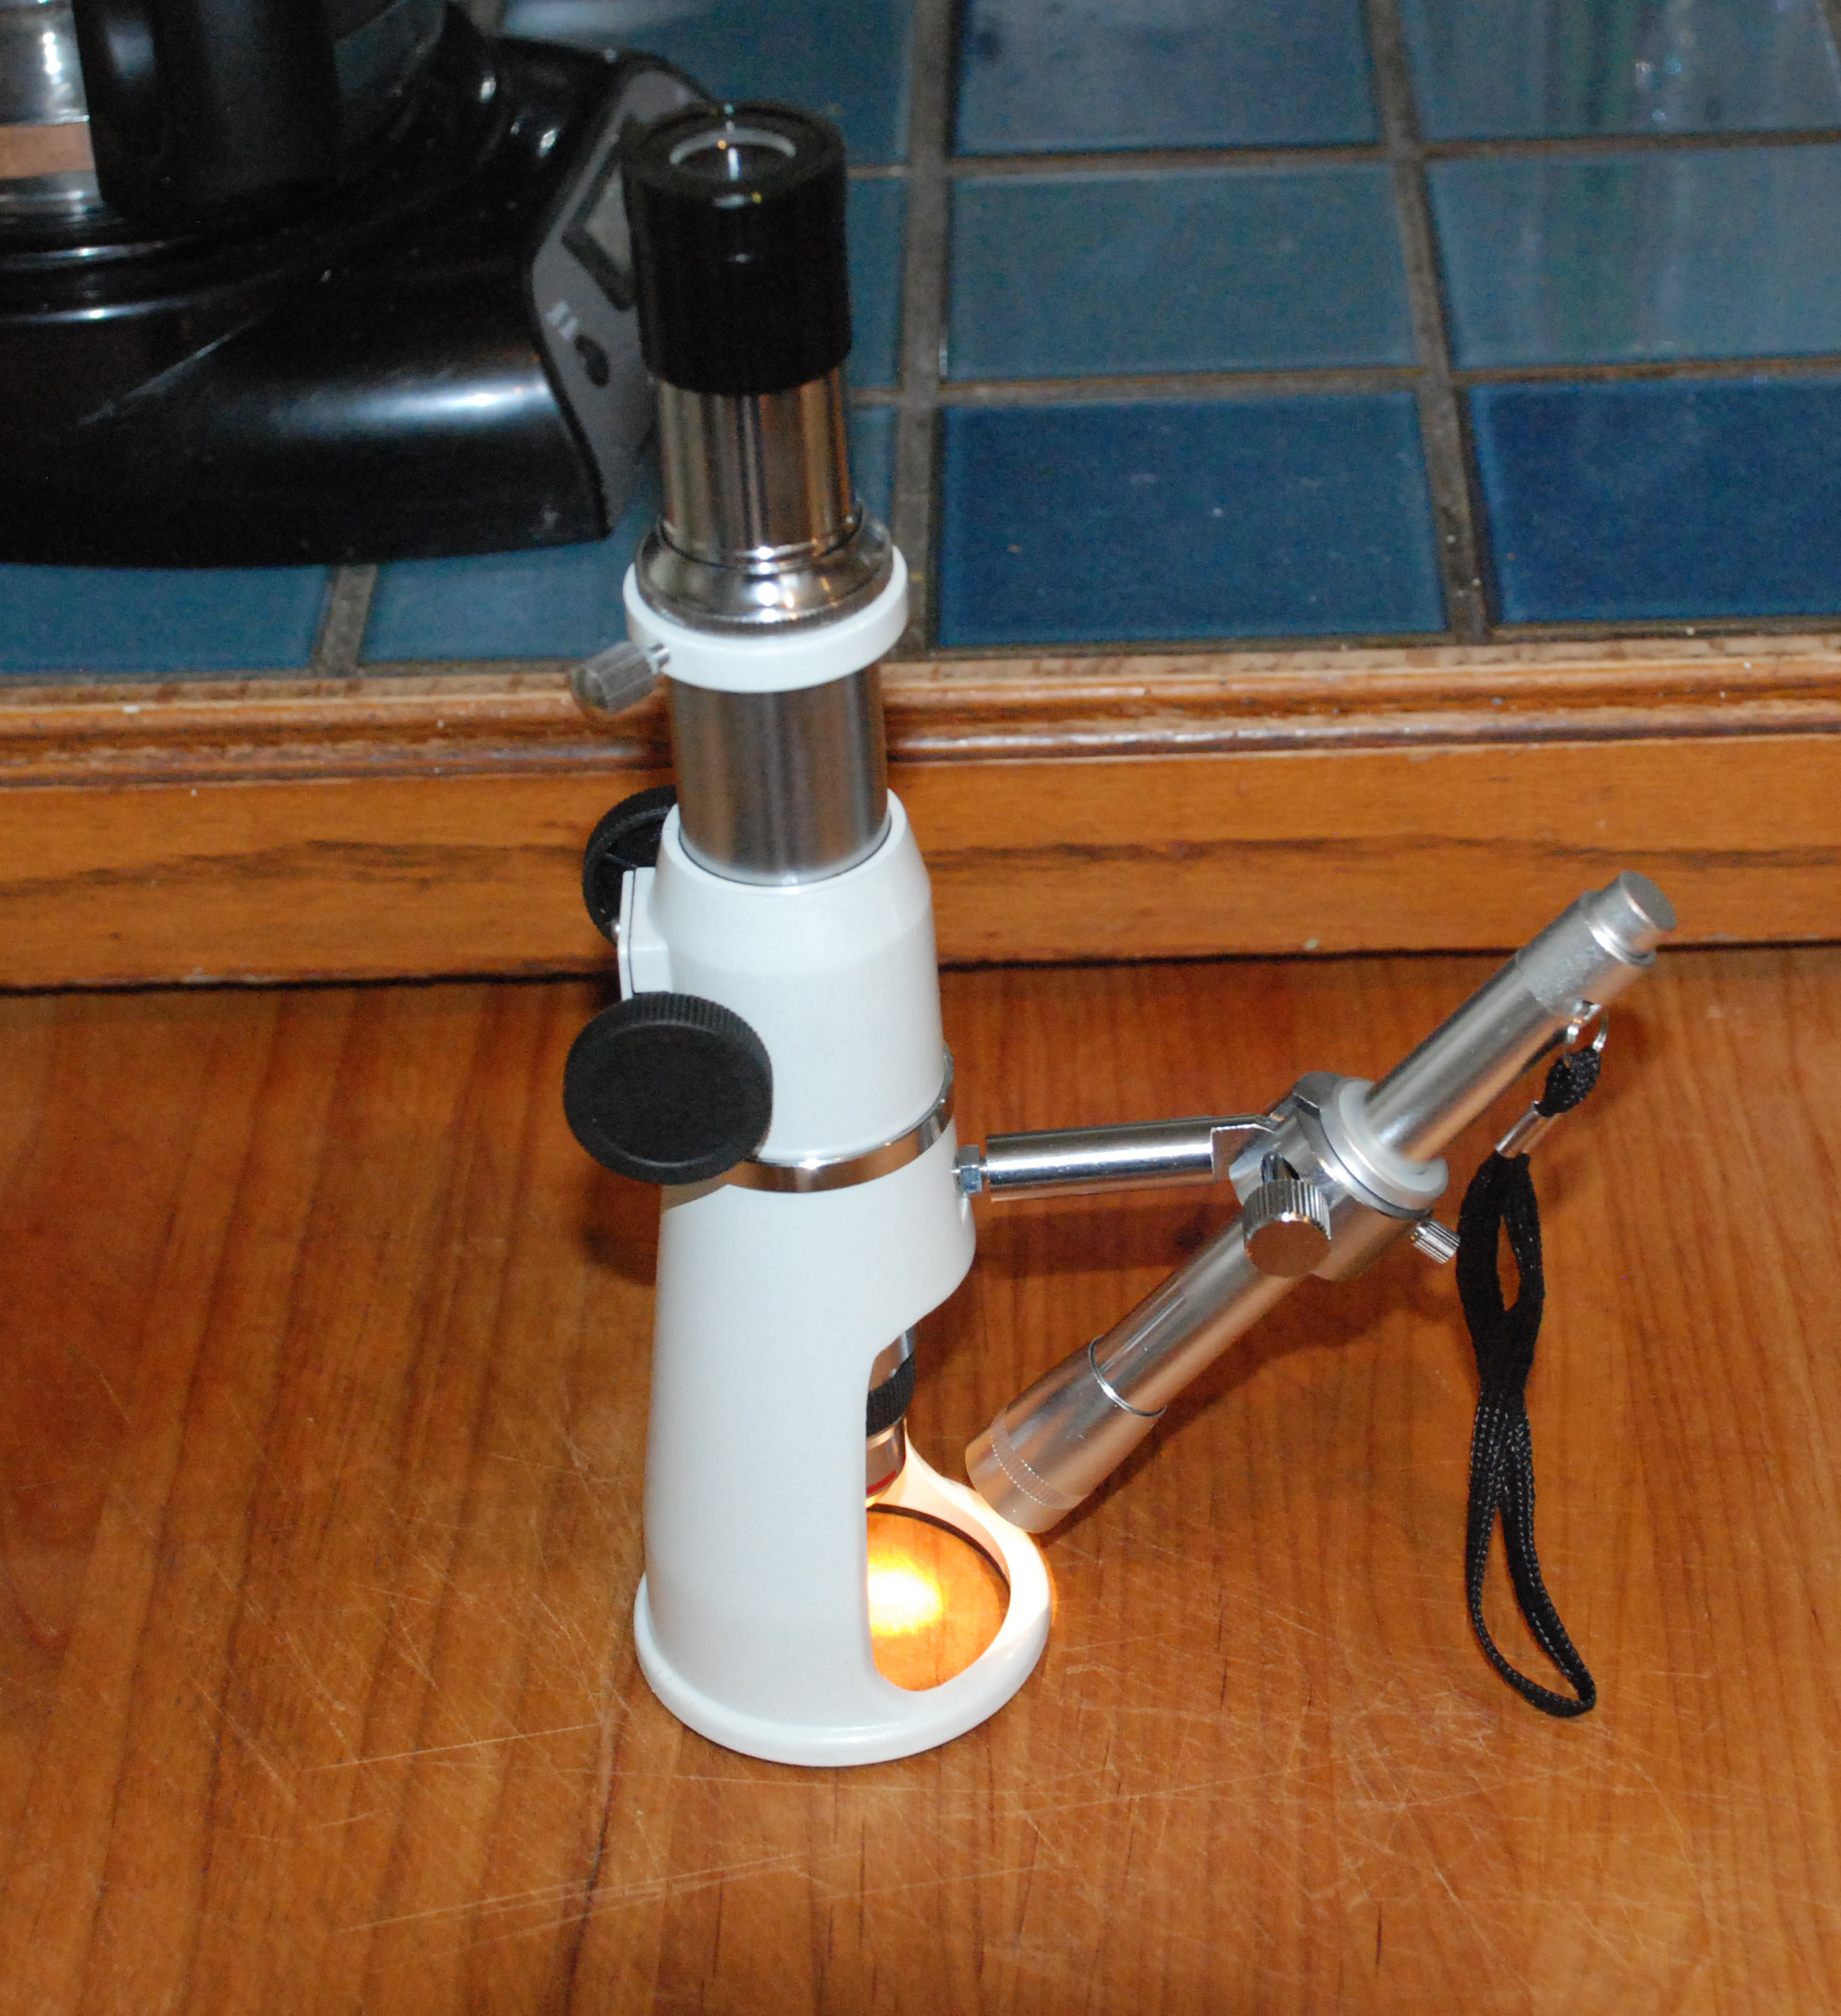
Picking average mesh sizes, here are the thoughts of Robert Clarke, in his book, HASHISH. Using a precision sieve stack:
150 microns - large plant debris
130 microns - very large resin glands
110 microns - large resin glands
90 microns - medium resin glands
70 microns - small resin glands and debris
50 microns - very small debris and little resin
below that - very small dust and debris
Understanding the mesh chart terms:
Discussing the hole size between the wires or threads can be confusing because often only the mesh or thread count is given.
In fact, with only that information, it not possible to determine pore size, because that number depends heavily on the diameter of the threads or wires used.
Attached is a chart of average pore sizes by Mesh, which is the same as Thread Count. If you want actual pore size, you may calculate it yourself as follows:
(1) minus (Thread or Mesh X thread diameter) will give you the total amount of open space per unit.
There are one less openings than threads or meshes, so dividing the total amount of open space by (thread or mesh count minus 1) will give you the size of the individual openings.
A micron is one millionth (10-6) of a meter. To convert your answer from threads per inch, divide the answer in inches by .00003937 to get microns
IE: 200 mesh or 200 thread count by the chart below, depends on the thread or wire size to be .0021".
1 - (200 X .0021" thread diameter) = .5771" Open space
Open space divided by (200 -1) = 74 micron Pore size
Pore size in inches divided by .00003937" equals microns.
|
MESH/THREAD |
INCHES |
MILLIMETERS |
MICRONS |
|
3 |
0.2650 |
6.730 |
6730 |
|
4 |
0.1870 |
4.760 |
4760 |
|
5 |
0.1570 |
4.000 |
4000 |
|
6 |
0.1320 |
3.360 |
3360 |
|
7 |
0.1110 |
2.830 |
2830 |
|
8 |
0.0937 |
2.380 |
2380 |
|
10 |
0.0787 |
2.000 |
2000 |
|
12 |
0.0661 |
1.680 |
1680 |
|
14 |
0.0555 |
1.410 |
1410 |
|
16 |
0.0469 |
1.190 |
1190 |
|
18 |
0.0394 |
1.000 |
1000 |
|
20 |
0.0331 |
0.841 |
841 |
|
25 |
0.0280 |
0.707 |
707 |
|
30 |
0.0232 |
0.595 |
595 |
|
35 |
0.0197 |
0.500 |
500 |
|
40 |
0.0165 |
0.400 |
400 |
|
45 |
0.0138 |
0.354 |
354 |
|
50 |
0.0117 |
0.297 |
297 |
|
60 |
0.0098 |
0.250 |
250 |
|
70 |
0.0083 |
0.210 |
210 |
|
80 |
0.0070 |
0.177 |
177 |
|
100 |
0.0059 |
0.149 |
149 |
|
120 |
0.0049 |
0.125 |
125 |
|
140 |
0.0041 |
0.105 |
105 |
|
170 |
0.0035 |
0.088 |
88 |
|
200 |
0.0029 |
0.074 |
74 |
|
230 |
0.0024 |
0.063 |
63 |
|
270 |
0.0021 |
0.053 |
53 |
|
325 |
0.0017 |
0.044 |
44 |
|
400 |
0.0015 |
0.037 |
37 |
Sources:
A good source for stainless mesh in small sizes and quantities is:
A good source for stainless mesh in larger sizes and quantities is:
http://www.howardwire.com/stainless_steel_cloth.html
A good source for a polyester monofilament silkscreen is:
http://www.silkscreeningsupplies.com/silk-screen-printing-mesh
A spline roller and spline can also be picked up at the above source, or use 1/8" window screen spline and roller.
Assembly:
Assembly techniques are different for stainless and silk screen material.
Stainless mesh installation:
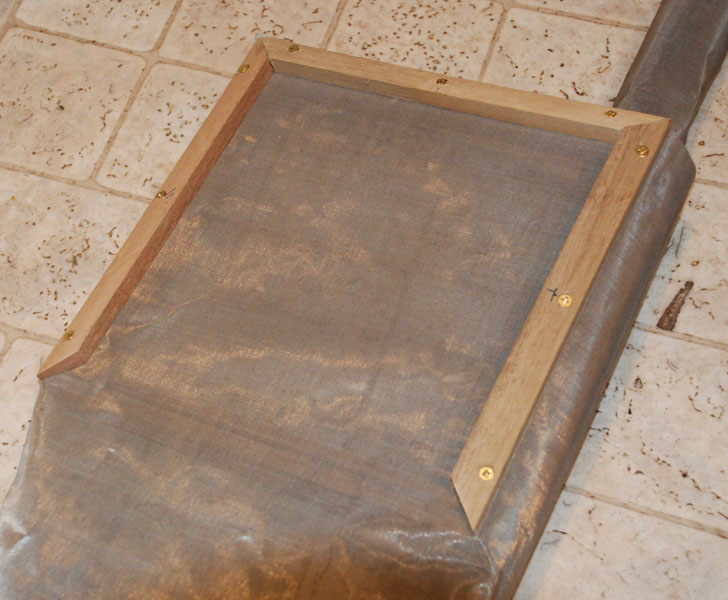
To install a stainless mesh into the frames, we start placing the frame upside down and laying the stainless mesh over the top of it. Start by aligning the top and one side of the stainless sheet, with the outside edge of the top and one outside edge of one side.
Place the top and side retainer strips in position on top of the screen and install the end corner screw in both strips. 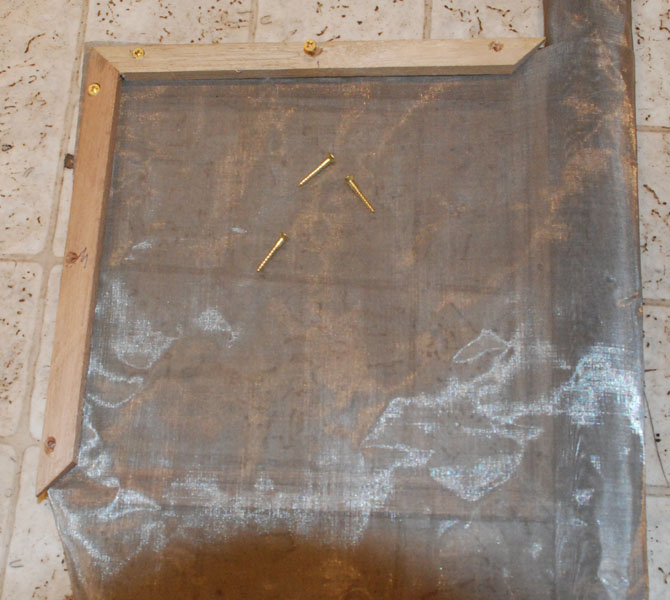
Pull the screen taunt in the opposite direction of the top retaining strip at the top of the frame, and install the other two side screws.
Pull the screen taunt in the other direction and install the other two screws in the top retaining strip. 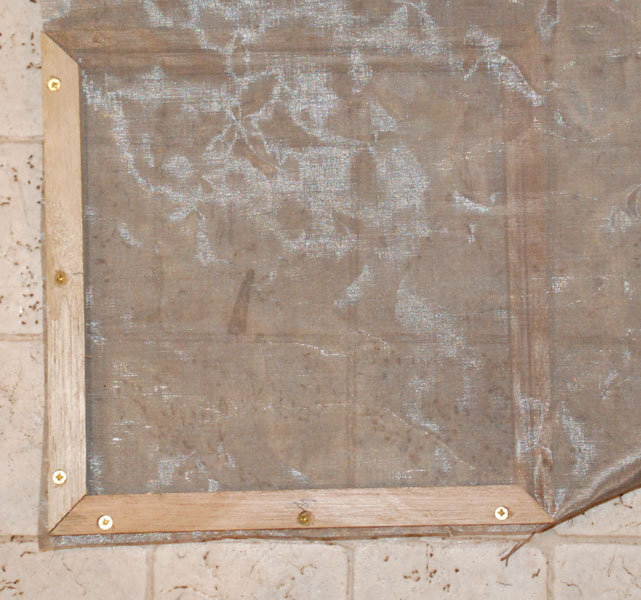
Install another retaining strip, and attach it with one screw, at the end that has the anchored corner.
Pull the screen taut diagonally and install the screws in the other end of the last retaining strips, followed by the center screws, while tensioning the screen in the middles of that side.
Install last retaining strip, and attach it with one screw, at the end that has the anchored corner.
Pull the screen taut straight towards the retaining strip and install the screw in the other end, followed by the center screw, while tensioning the screen in the middles of that side. 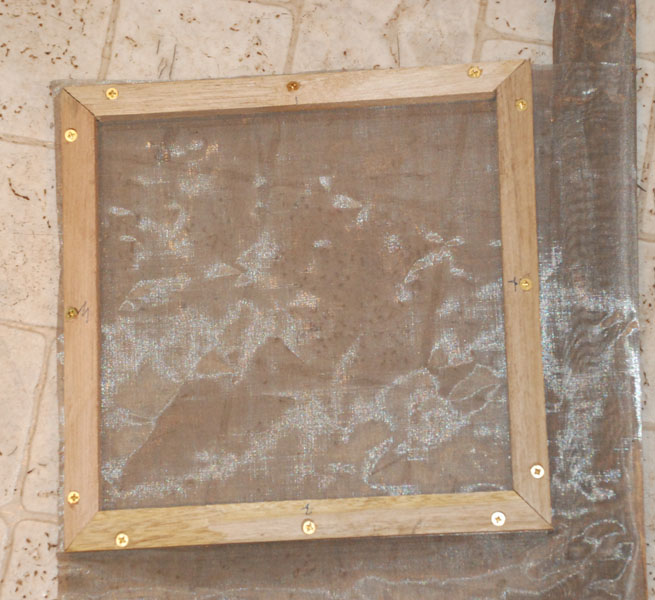
Trim off the excess mesh with a razor knife. 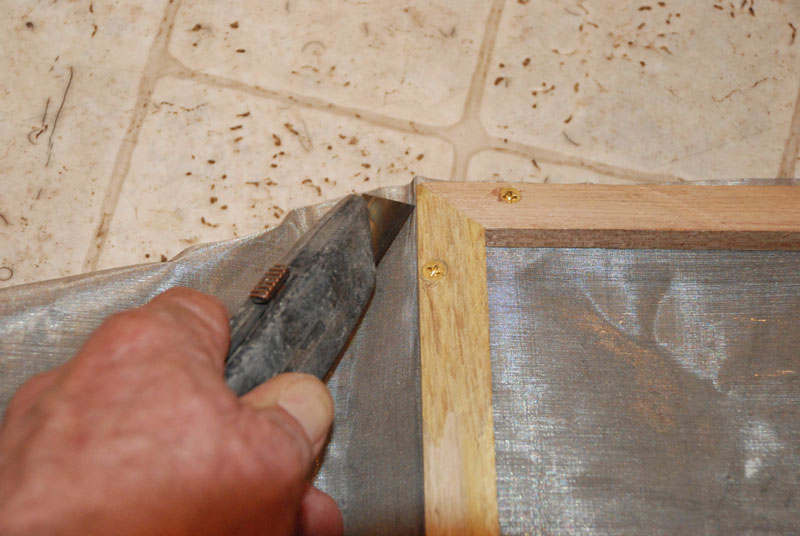
Silk Screen mesh installation:
The silk screen is installed by placing the frame face down, and laying the silk screen over the top, with the edges extending beyond the outside edges of the frame a quarter inch or so.
The spline is started in one corner, and rolled in an inch or so, with enough extra spline left sticking out, to reach half way to the opposite side.
That short length of spline is wrapped around the corner, and rolled in, while tensioning the silk screen with the other hand.
Tensioning is important, as silk screen is stretchy, and you can change or distort the opening sizes, by how much tensioning you use.
It should be taut enough to bounce when you tap it with your finger, but not stretched like a musical instrument string.
Experiment a little and if you don't like the results, pull out the spline back to the original corner, and start over again.
The rest of the spline on the first side is then rolled into place, and wrapped around the lower groove corner, while tensioning the screen in that direction.
The last side is then rolled into place, tensioning the silkscreen material in that direction, and the corner wrapped. Roll in the final strip of spline and cut to length, while tensioning the screen material in that direction. 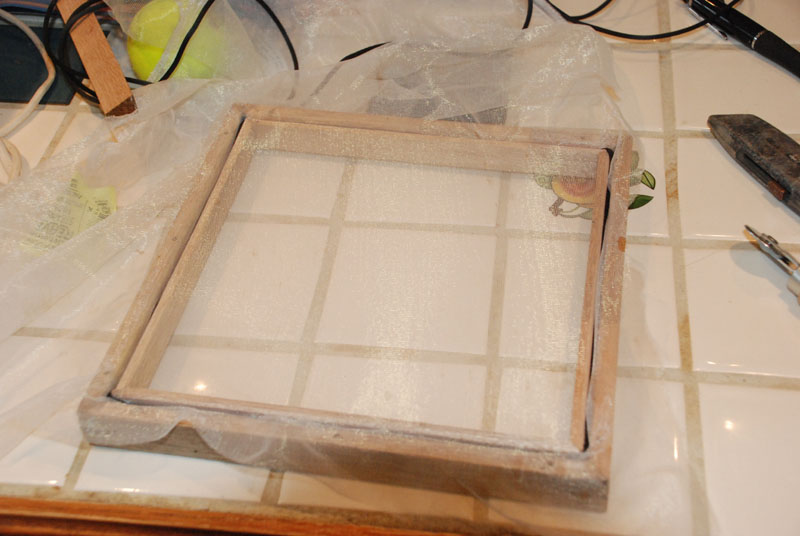
Trim off excess screen material: 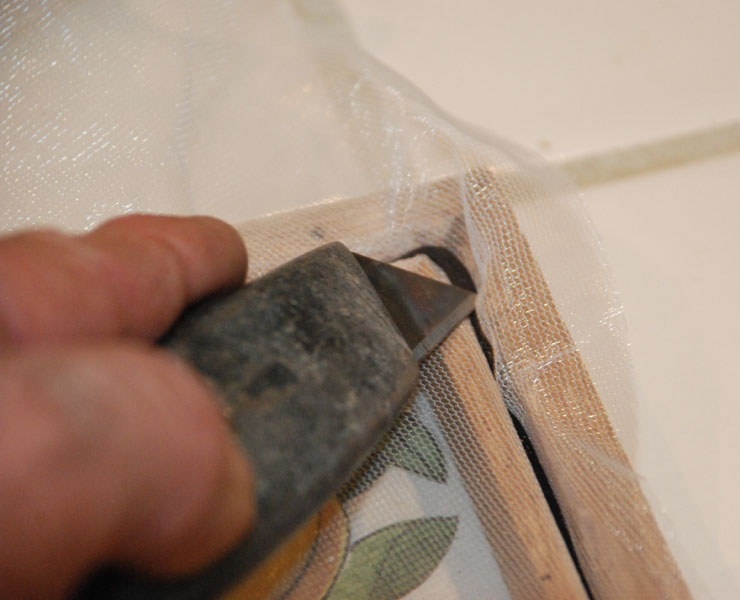
Install the retaining strips with three screws each. 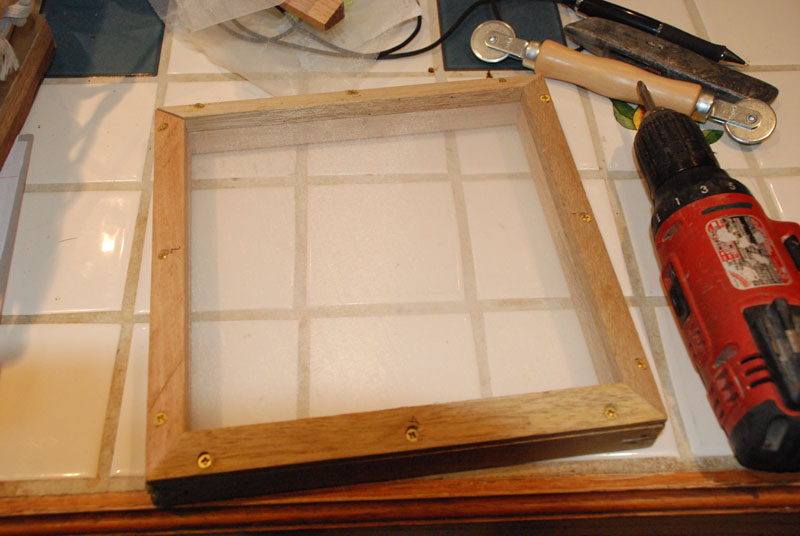
You are now ready to roll, unless you want more, and you will!
Here is a stack of different size mesh frames, that I made a lid and bottom for the purposes of carrying them around, and allows keeping a variety of different meshes on hand for experimenting.
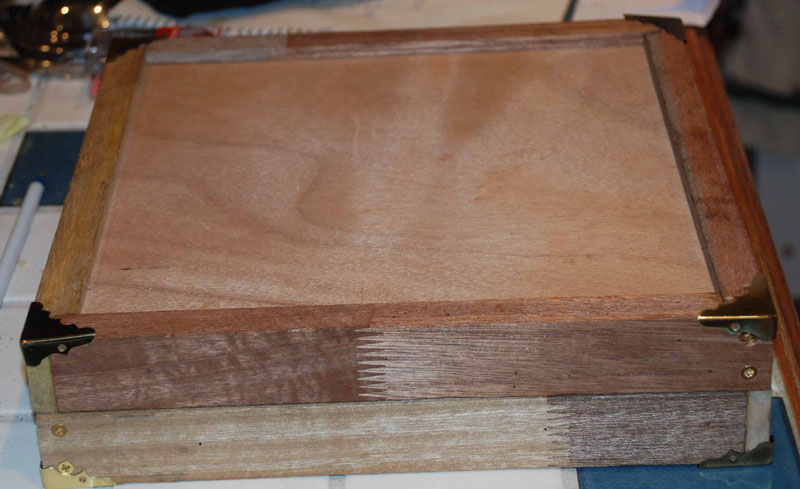
Here is also a Harvest box, which has a tray with a 130 micron stainless screen in the bottom, setting a mirror. I trim and break up my bud in the box, and when the day is over, I lift out the tray and harvest the kif on the mirror.
A good way to end the day!




Wonderful post, always find this site to be a reputable source of the latest information and technique. I found this article because I was trying to buy some sift screens and so far the best I can find is a 4 screen system that has the following micron equivalents, 250, 165, 149, 75. By Robert Clarke's guide, this is lumping in "large plant debris" with all the resin heads then the bottle screen of under 70 is going to collect essentially nothing... but "very small debris and little resin". If I am understanding this correctly, any idea why the construction of these screens is so misguided?
Thanks for this info. I'm learning how to make dry sift hash using silk screens but there's a lot of conflicting information online (YouTube and Marijuana forums). There videos where dry sift screens are arranged from lowest micron to highest. Like, 70 micron, 110, then 130 at the bottom. In My Opinion, this arrangement only works with bubble bags. Your article has helped me gain the right direction in terms of screen arrangement. Currently. I reside in Kenya and have access to landrace Ethiopian sativa strains filled with plenty trichomes.
Hey bud I have a question ? How much would you charge for a 200 micron, 110 micron, and 80 micron or 75 set custom built by you? Those numbers on the screens may be off but as close as you could get to match those microns. Please email at cannagrodis@gmaim.com many thanks Pharma fafe
Thanks for the good thoughts brother, but sadly my time is seriously over committed at the present, so I don't know how I would fit it in. It's an easy project, so if you can locate a competent local carpentry resource, I can answer any questions they may have on sources and construction. GW
I'm having a hard time following your calculations. If I want a 150 micron stainless steel bolting cloth. What would the MESH PER LINEAR INCH, WIRE DIAMETER INCHES ,WIDTH OF OPENING INCHES, and the OPEN AREA PERCENT be?
Take a look at the 100 mesh in the chart, with a hole 149 microns. GW
Hello,just wanted to tell you,I enjoyed this post. It was inspiring. Keep on posting!
Thanks for the good thoughts Nike!
Daannngggg! A real chromatograph even. I read and dream, and in the meantime try to get by with my cave-man setup. Always the same issue.. the moolah. Classes? Tours?
We have the same cash flow issues, but just keep pecking at it. It took two years to afford to build our first Mk I Terpenator, with all of us contributing. Ohmmmmmmmmmmmmmmmmmmmmmmmmmmmmmmmmmmmmmmmmmm!!!!!!!!!!!!!!!!!!!1
Hello skunk pharm!! I have been stuck on your site for 3 weeks now. My question is your opinion on the sieving method compared to a bubble bag with dry ice or cold water method. Thanks again and I am in line for the second run of the terpenator kit. Can't wait
We do both bubble and dry sieve and I prefer dry sieve for its flavor profile. We haven't tried dry ice dry sieve yet. GW
congrats! but ya need a shelf specialist to make the most efficient use of the 4 walls :)
We sure do, because most of the glassware is still waiting to come over. GW
Suuper Duper, I'm from Mexico, I've been growing my own medicine for about 17 years here in my home, and I have some homemade distiller, maybe I should copy some ideas of yours, to beggin with a Green Shack like yours, my yard is so big and I'm always there. Thanks for your blog and your info. Mojox
Thanks for the good thoughts and good luck with a green shack! GW
[...] Skunk Shack’s doors open and on line. Share this:TwitterFacebookMoreTumblrLike this:LikeBe the first to like this. [...]
WOW, great work guys, i could only wish to one day be able to build a setup like this. Keep up the knowledge guys!!
Thanks for the good thoughts! GW
Absolutely perfect. Thanks for the photo's. Please find more here on uses of "The Shack" http://www.specializedformulations.com/index.html
I am Impresssed!!!!! Keep up the great work guys and gals!
Thanks bro! GW
Nice design, the quality and care shows.
Thanks bro!
Thanks GW
Ohmmmmmmmmmmmmmmmmmmmmmmmmmmmmmmmmmmm!!!!!!!!!!!!!!1