

Polar /Non Polar Extraction.
Some of our readers have shown interest in isolating the acidic from the neutral cannabinoids. So I set out to nail down a DIY capable procedure for the masses. The cannabinoids are first produced by the plant in their carboxylic acid form and over time these compounds are reduced to their active phenolic form. There is some evidence suggesting the medicinal benefits of the acidic compounds may be different than the phenolic compounds. This procedure will isolate the carboxylic acid compounds from the phenolic compounds. Keep in mind that heat, UV light and reactive oxygen species will reduce the carboxylic acids to their phenolic form.
Note: All or almost all of these items can be picked up locally or on Ebay. Be sure to always look at compatibility charts for anything not made from quartz or borosilicate glass.
Equipment needed:
- Glass or other chemical resistant funnel
- Glass beads size #13 (used for sandblasting)
- Glass container(s) (as many as you need for extracting)
- 3) 500 mL Erlenmeyer flasks (or quart mason jars)
- 3) Pasteur pipets or glass droppers
- 3) Glass 4oz bottles with droppers
- Glass stir rod
- Glass or other chemical resistant 250 mL graduated cylinder
- Oil bath
- PH paper (1-12)
- Balance or scale capable of weighing 0.1g
- Nitrile gloves
- Safety Glasses
- Coffee filter
- Hair dryer
- Ice bath
Chemicals Needed
- 100 mL 0.1M sodium hydroxide (NaOH) Food Grade
1M = 40g/L 0.1M = 4g/L or 0.4g/100 mL (This solution is made by adding NaOH to a 50 ml of water, slowly while in the ice bath, then bringing to the final volume)
- 100 ml 32% hydrochloric acid (HCL)
- 100 ml 1% HCL
(This solution is made by adding 60 drops down the inside of the glass into 97 ml H2O) ($5 for 500 mL of 32% on ebay)
- ACS grade n-Hexane 3L /50g flowers for extraction
~250 mL for washing sand filter ~100 mL for NP extract from sand filter (~$18/L on ebay, always buy a little more than needed)
- Denatured or isopropanol alcohol
- 1 gallon distilled water
- 10g Kosher salt (add to the water)
Note about safety: Always read through the procedure twice before you gather your chemicals and supplies. Make all your solutions label them with the chemical, concentration and the date they were prepared and set aside. I can’t stress labeling enough and not just for your sake. Check off each step as you go along in case you are interrupted or have a stoner moment. Move slowly and deliberately to avoid accidents. Don’t forget to wear proper safety equipment. When working with acids and bases it’s always advisable to keep a baking soda and water solution to neutralize any acid spills or splatters and a mild vinegar solution to neutralize any base spills. Kitty litter has saved my hide and I suggest you keep some handy.
Note on acids: Always add acid to water; never the reverse. Always drop down the side of the container so that it runs down the glass. When washing the sand filter with acid get as close to the beads as possible to avoid splatter. While uncomfortable 32% HCL not immediately scar your skin; you ll know immediately that it’s on you, but don’t panic. Baking soda is your first choice then flush the area for 15 min with running water. If it’s in your eyes flush immediately with water holding your eyelids away from your eyeballs. 15 min is an eternity when you are under the water and more is better in this instance.
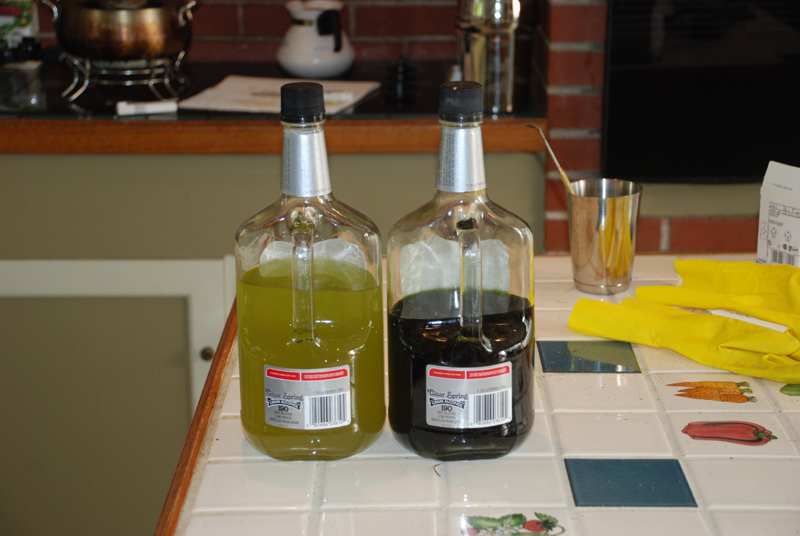
Overview: This procedure can be used with fresh material if you want mostly carboxylic compounds. If you are using fresh material finely scissor chopped is sufficient. The longer the material is exposed to the hexane the better your yield will be. Decant the hexane through a strainer to catch any particulates. Hexane boils below any significant decarboxylation temperature; so there is no reason to worry about any unintentional conversion when reducing the extract. The reduced extract should be easily dropped but still thick.
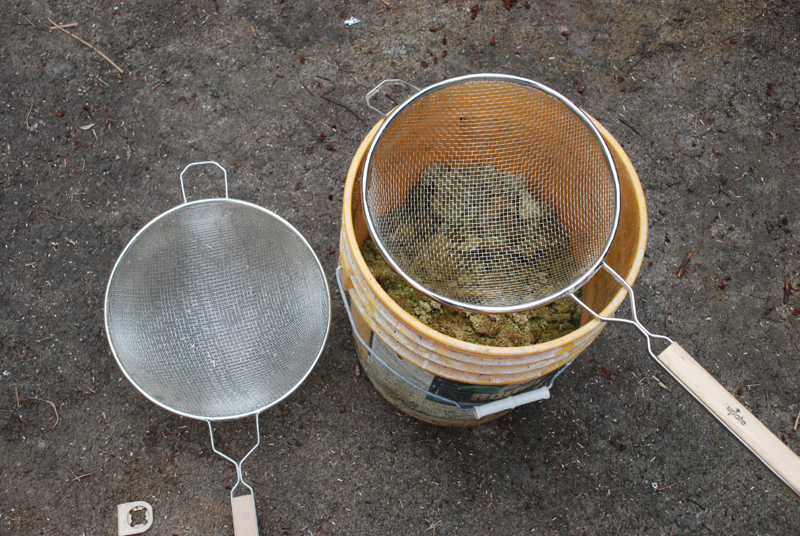
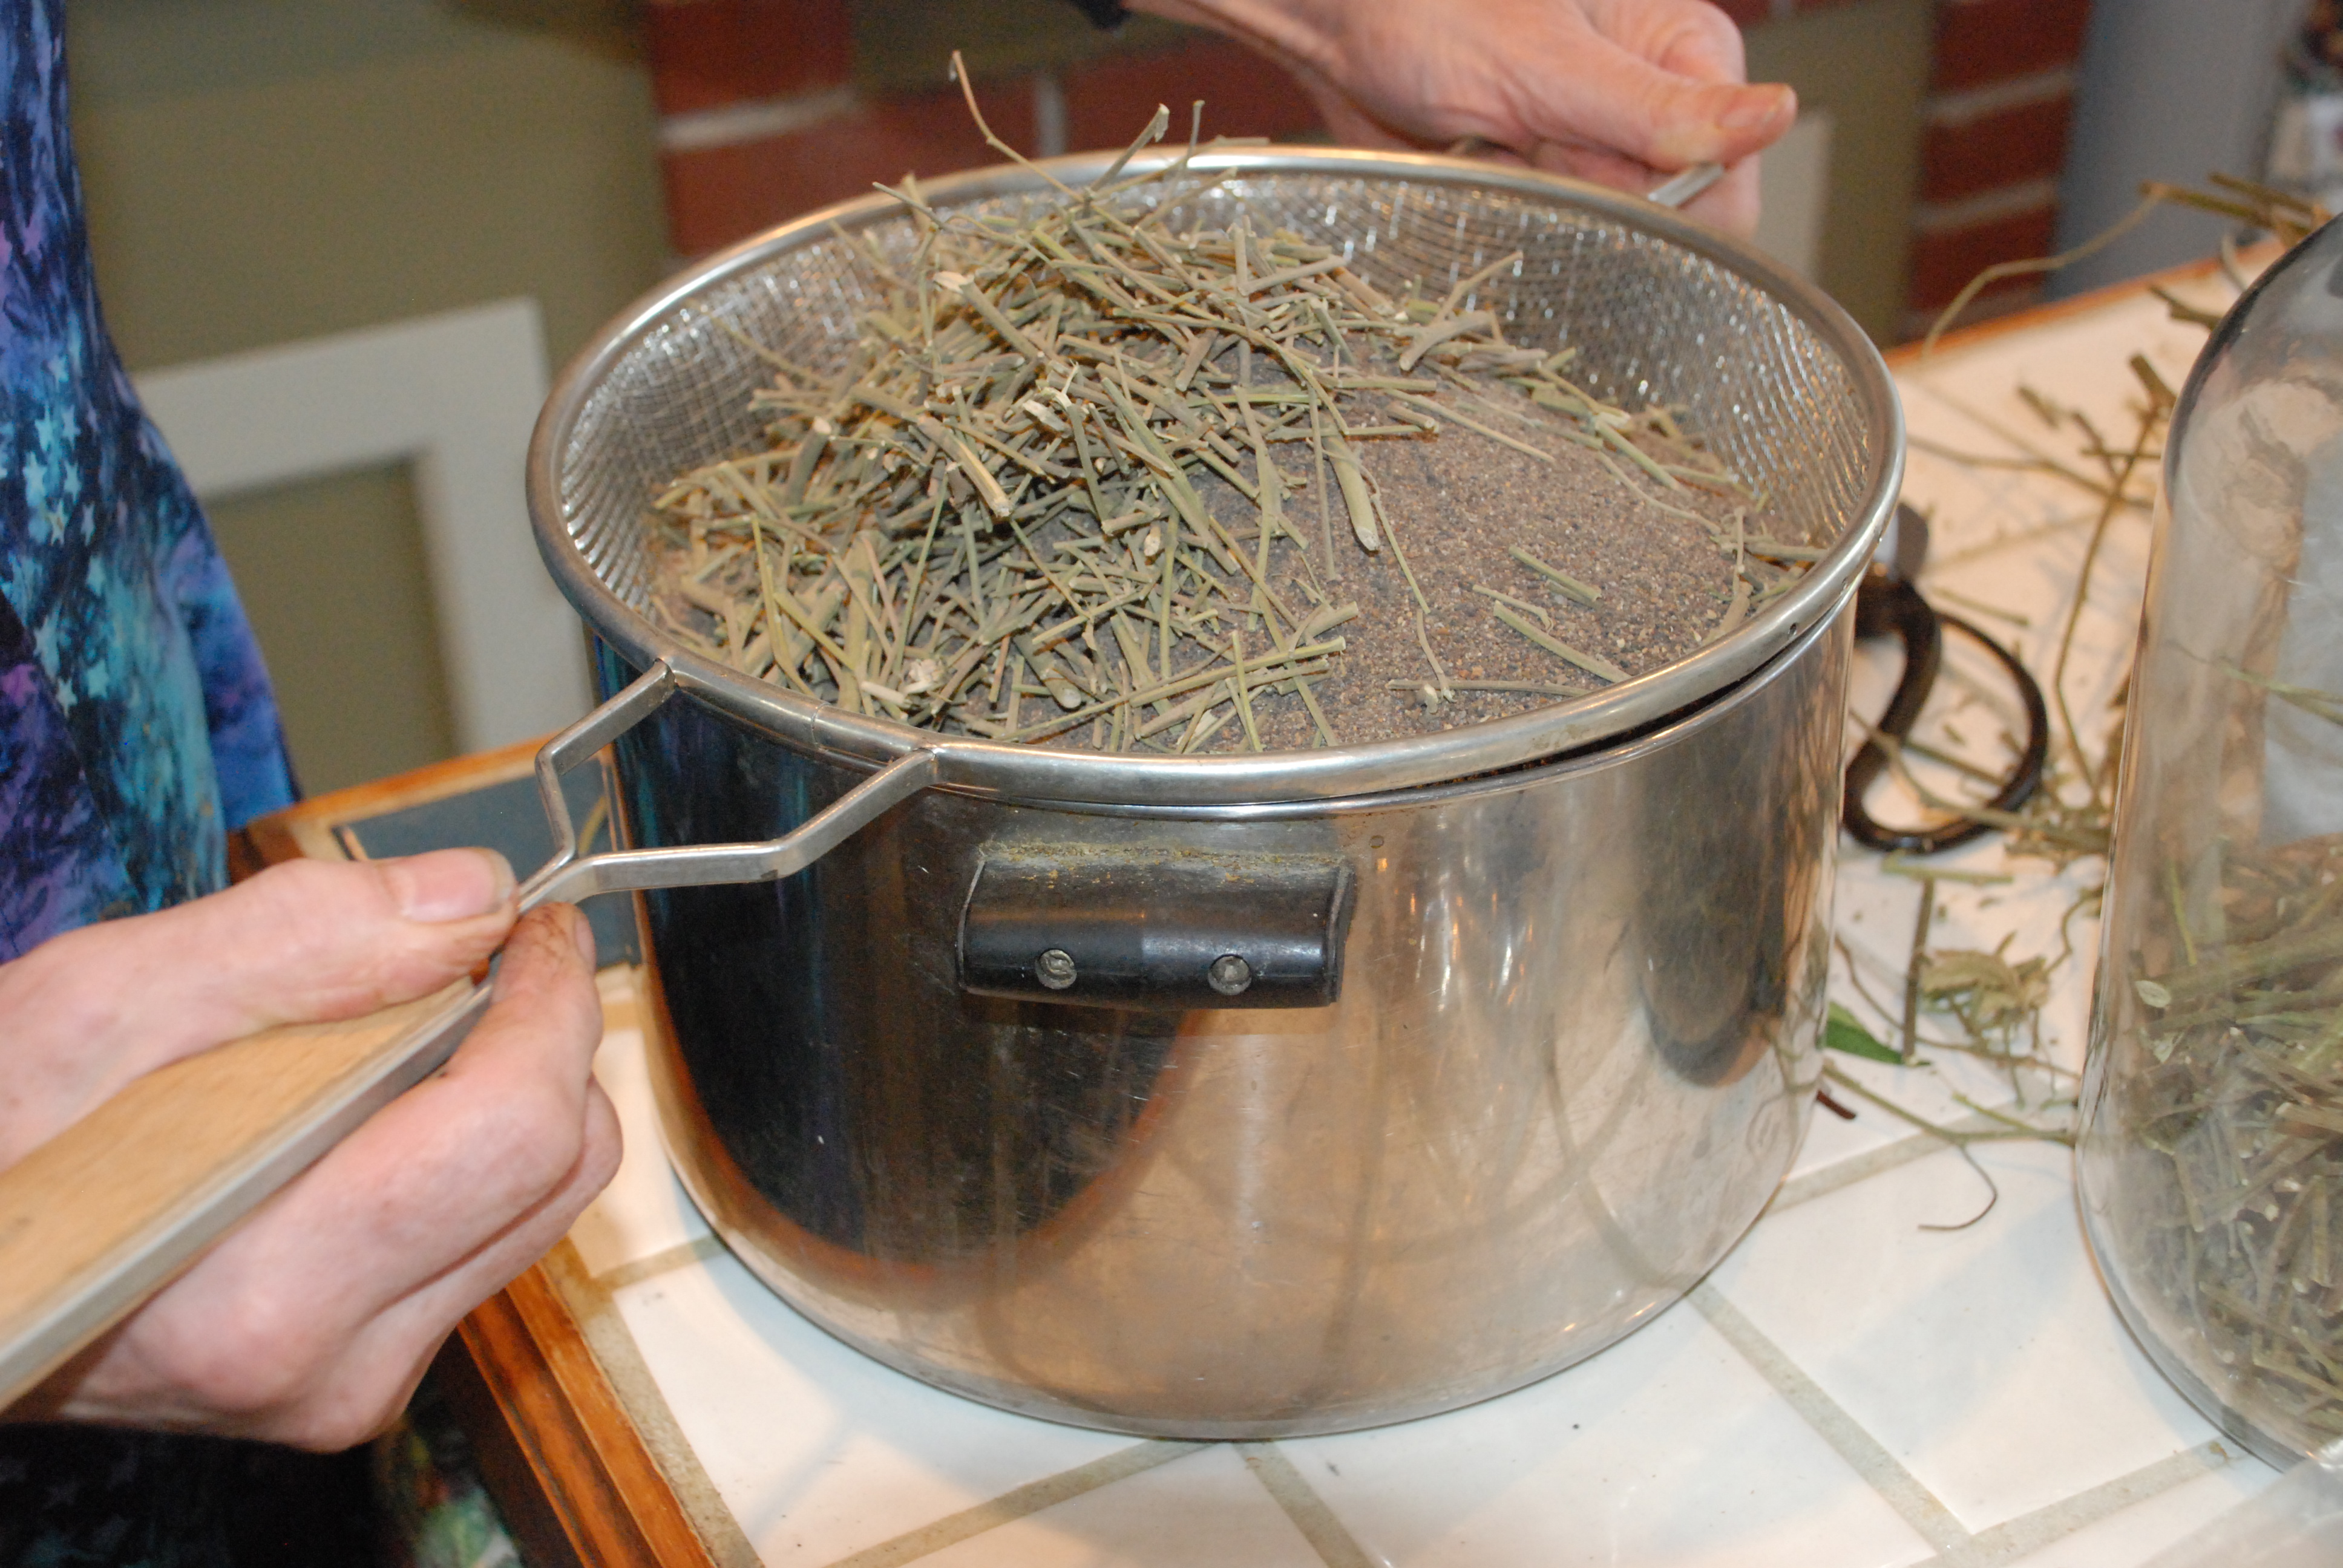
The sand filter is elegantly simple in its purpose. The glass beads provide a surface to dry the extract and because they are wet with H2O when you apply the hexane extract will remain on the surface. The glass beads need to be washed with all those chemicals in series to remove any impurities that would co extract if you didn’t. It is very important that the sand filter is wet when you apply the extract so moisten if necessary.
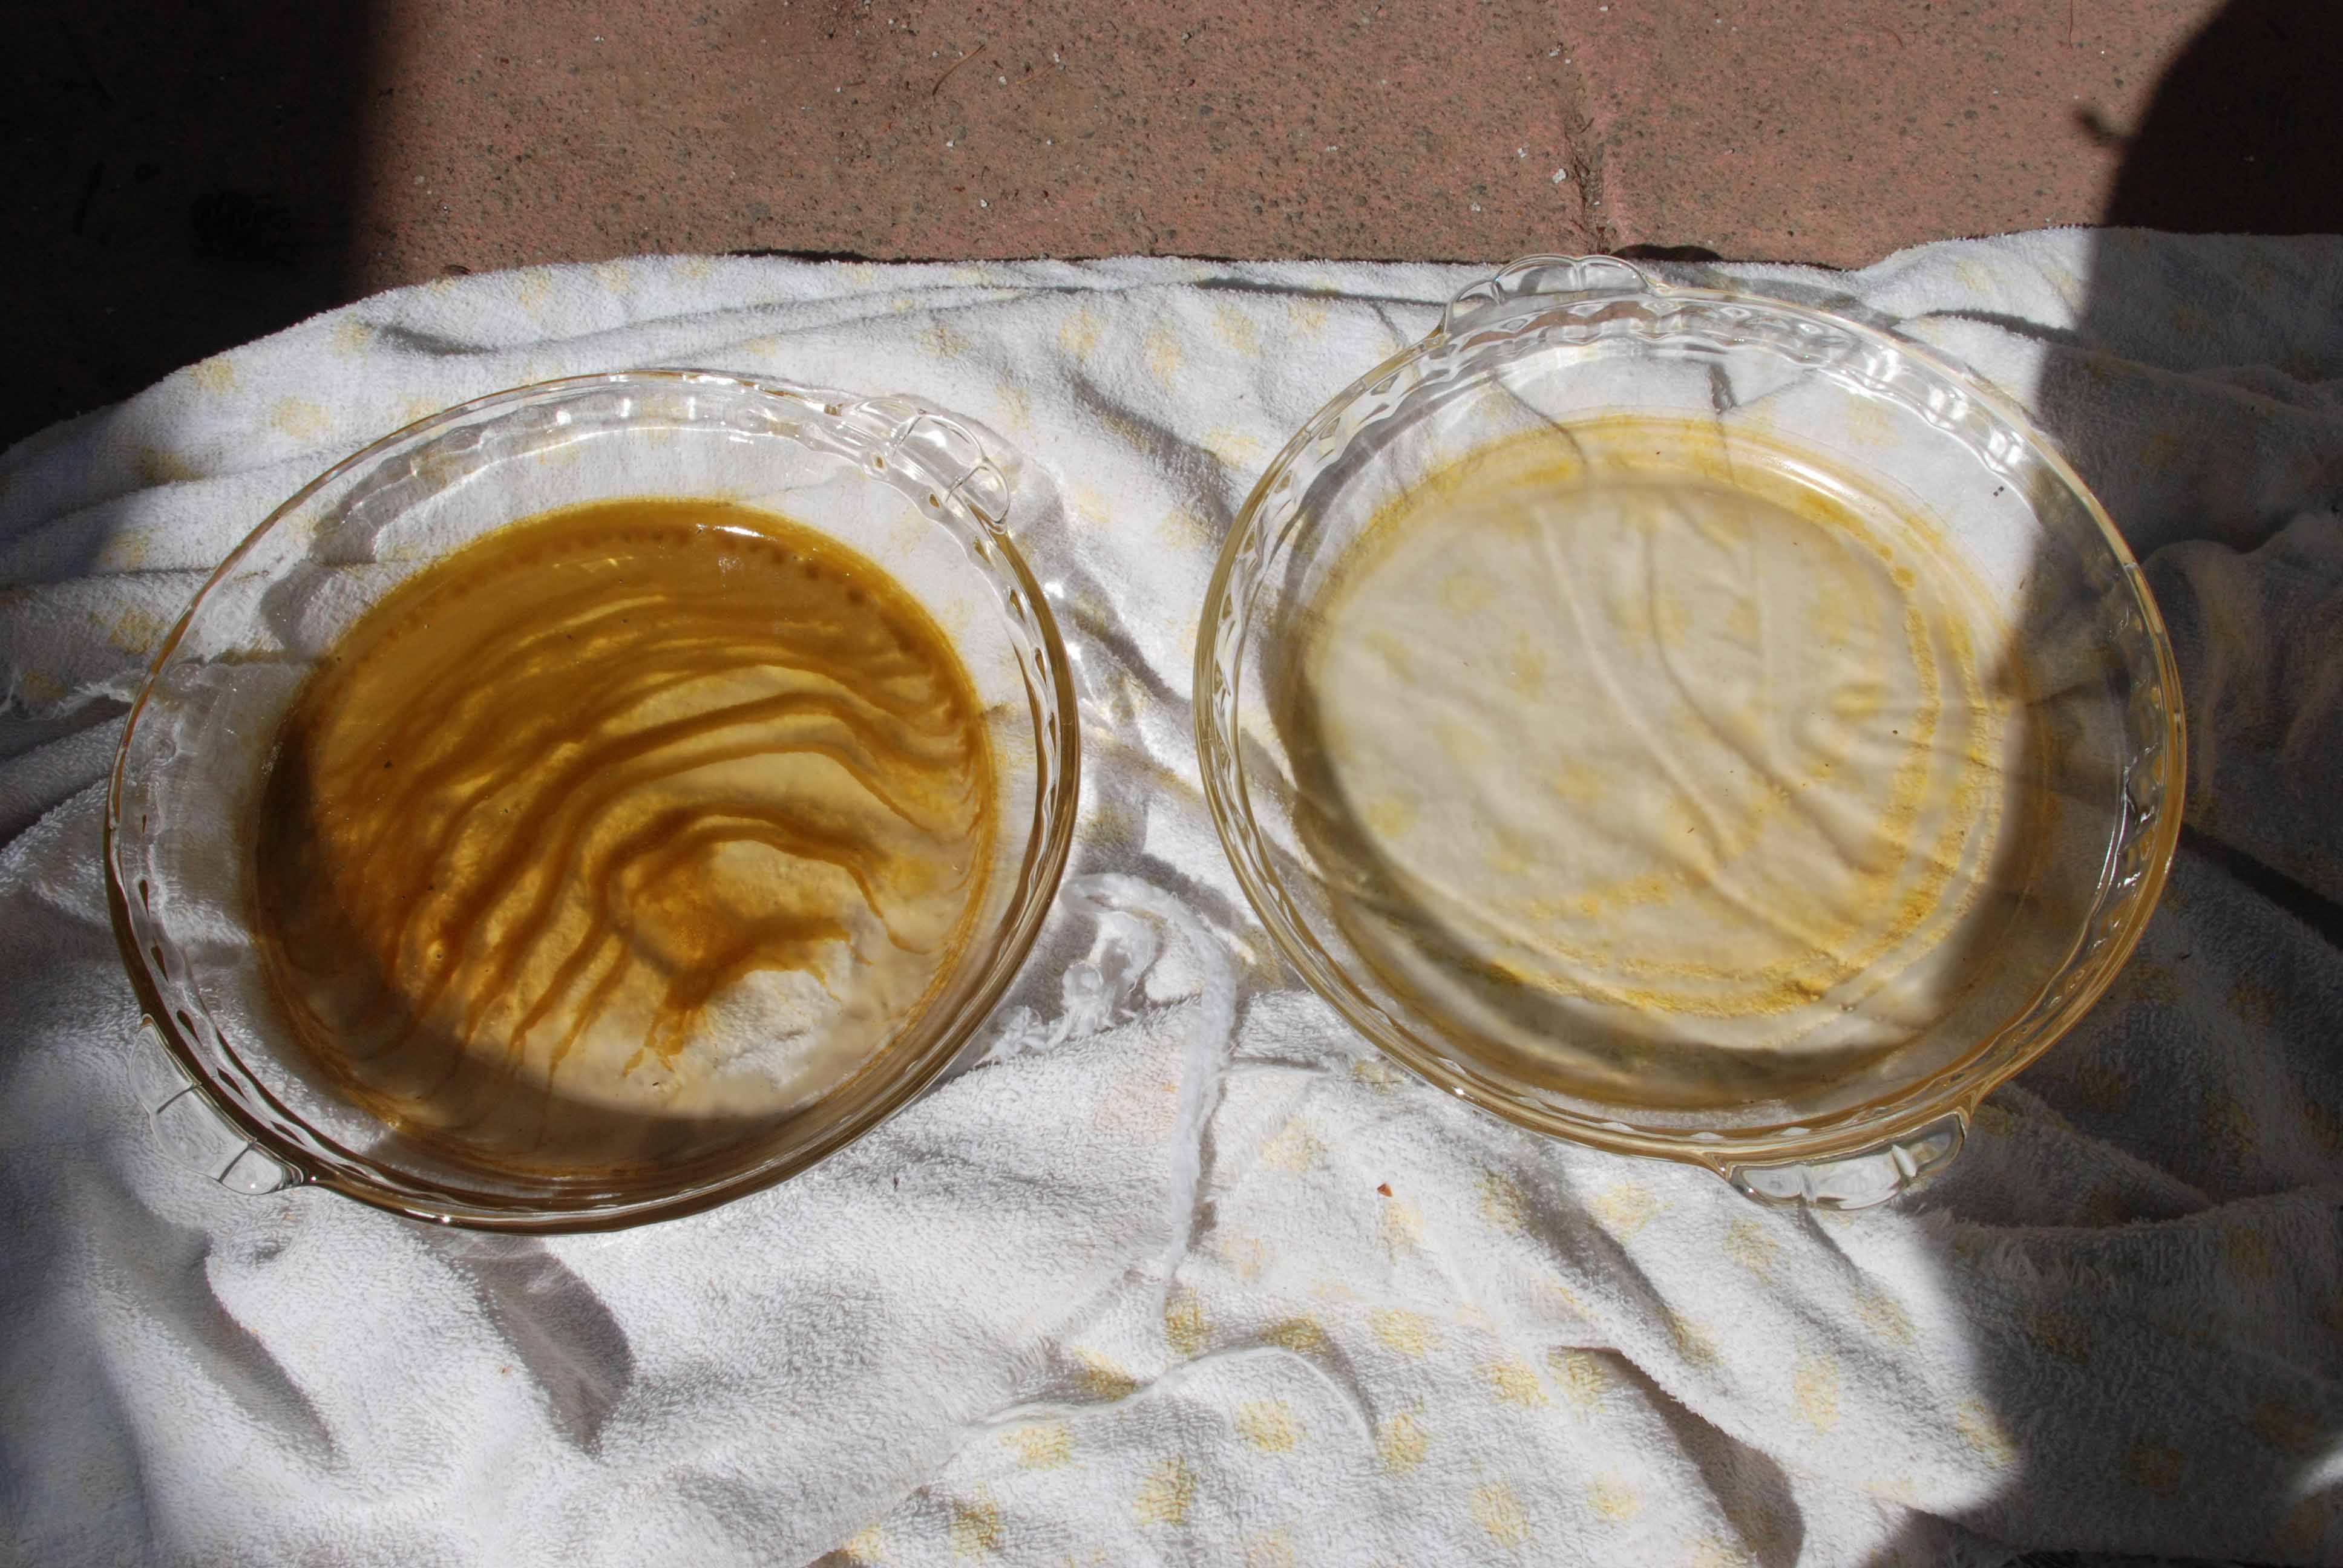
The polar extraction from the sand filter will remove few impurities and will be the highest quality of all the extracts. The color change from orange to clear is a convenient indicator that you are finished and can move the filter to the semi polar collection container. The semi polar extraction will be the dirtiest of the extracts. Most people don’t like to waste their hard work and this extract is still worth using. The alcohol also helps to wash away the impurities that would otherwise end up in your non polar extract. After washing the filter clean with hexane in the non-polar extraction the filter needs to dry completely. While the sand filter is drying proceed with acidifying the polar extract to a PH of about 2 then filter. Neutralize and discard the flow through then re extract the filter with alcohol. Reduce the extracts until dry and polish as you like. See our polishing extracts page for more info.
Procedure:
- Grind thoroughly dried and de-stemmed flowers and sift out any woody material.
- Place material into a large glass container(s)
- Add 1L of n-Hexane per 50g material
- Mix well
- Let stand several hours
- Decant n-Hexane and retain
- Repeat steps 3-6 two more times
- While Hexane is extracting prepare the sand filter
- Place the coffee filter into the funnel folded over without wrinkles
- Fill funnel 2/3 of the way with glass beads
- Wash with hexane
- Wash with alcohol
- Wash drop wise with 1% HCL ( if you see bubbles keep washing)
- Rinse thoroughly with distilled water 3 to 4 funnel volumes
- Set aside
- Combine and reduce hexane extracts in the oil bath to a thick resin
- Note: Hexane can expand rapidly (3 times the liquid volume or more) when heated without constant stirring.
- Re wet sand filter with H2O
- Drop wise place hexane onto the center of the sand filter while drying with the hairdryer
- Label the 500 mL Erlenmeyer flasks (or quart mason jars)
- Polar
- Semi Polar
- Non Polar
- Polar:
- Drop wise extract with your 0.1M NaOH until the liquid turns from deep orange to colorless. Rinse with H2O
- In an ice bath: Acidify the extract with 32% HCL drop wise on the glass
- Semi Polar: Rinse sand filter with 200 ml Alcohol
- Non Polar: Rinse with hexane until colorless
- Filter the Polar extract after the sand filter dries.
- Neutralize the polar junk that’s left with 0.1M NaOH and dispose
- Then extract with alcohol into a clean container
- Reduce all extracts
- Polish each as you like and enjoy
We will update this page with pictures in the future.
Joe
Update, Pictures:
Your interpretation of the sand filter seems flawed. Are you suggesting that the drop wise addition to dry (ambiently hydrated) and blown dry (as in the original Hazekamp thesis) doesn't work??
This procedure is kind of confusing, I can't wait for step by step pictures of the process :)
So what does this look like in the end? And what are the differences in effect?
There is a range of colors, mostly lighter, and effects are similar.
can r-12 be used in the extraction of thc
One of the breakdown products of R-12 Dichlorodifluoromethane, is hydrofluoric acid, so I don't recommend using it for extraction. http://www.airgas.com/documents/pdf/001018.pdf
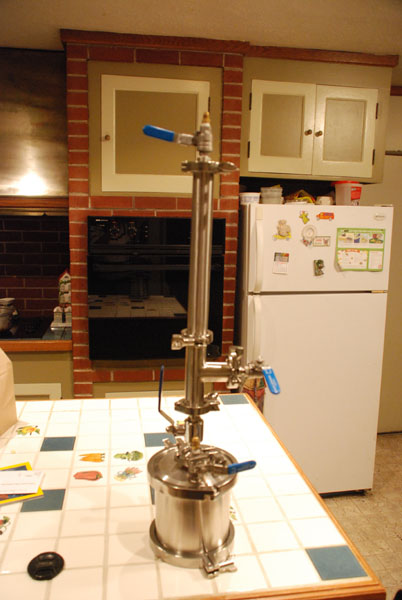
I just received my Mark III kit from Specialized Formulations and I was wondering if there are any instructions for building and/or usage posted anyway online or in a printed version. Everything looks good, but I am totally new to these self contained extractors and i don't know where to start. I did find links to the Appion, recovery tank and lines/hoses but I also read where some people are getting their tanks contaminated on the first run from maybe the lines/hoses or from the vacuum pump. What are the best type hoses to run on all the fittings? Also are there special filters needed anywhere inline for the vacuum pump or before the recovery tank and which filters will I need? I basically need help assembling and getting it up and running and I will need layman terms to understand it.
Hi John! Yes, you can find step by step operating instructions on our Mk III Terpenator thread at http://skunkpharmresearch.com/mk-iii-terpenator/. There is also a list of other equipment needed and some sources for them. Don't know where you are located at, but you could also attend one of our BHO extraction classes in Portland, Or, for hands on instructions both assembling and operating a Mk IIIA. Good point that all hoses are not created equal, and we are currently using US made Kobra hoses for our own equipment. They have an inner thermoplastic liner which they list them as compatible with propane and butane refrigerants. I've contacted the Kobra distributor, as well as Goodyear and asked for more information on their inner veneer hoses, which I will supply when received. Typically a nylon veneer thermoplastic hose is rated excellent up to 120F for butane service, according to http://www.coleparmer.com/Chemical-Resistance The seals are actually the first thing to wear out and the Kobra hoses use Neoprene seals, which are also rated excellent in butane service by Cole Palmer. We also buy replacement seals, for when they start to leak. It was never really established where the oil came from, so I don't know that Yellow Jacket hoses were the source. I do know that we haven't had any problems with the Kobra hoses by JB Industries. http://www.jbind.com/products/Hoses.aspx , which we get at RSD refrigeration supply locally.
OK thanks for the reply and Carla has since been in contact with me to help as well. I was also Planning on using a hydraulic thread sealant instead of teflon tape just because it works better and is much easier. I use it on all of my compressor and air tool fittings with success, but I wanted to check in and see if there would be any problems using it on the fittings with this machine? It is loctite (henkel) 545 and here is TDS on it. It isn't really a threadlocker so you can break parts apart easily but it seal very well. http://tds.loctite.com/tds5/docs/545-EN.PDF
I wasn't able to find any information regarding its suitability for food grade applications, so I will reserve comment. 300 Series stainless to stainless fits are prone to galling, so my inclination is to stay with the heavy Teflon tape.
GW, you are the man! Thanks for the endless inspiration. My first visit to Skunk Pharm Research. Wont be my last. Curbside Service
Very interesting! You're saying this should make two separate extracts? Any idea what the final products should look like? Confused as to the difference in the final extracts, are they both still the acid form? You guys are always helpful! Thank you
There's two extract's; the carboxylic acid and the non polar fractions.
Hi GW, Is there any reason why you moved to manufacturing your own refrigerant recovery tanks instead of continuing to use the mastercool 50lb tanks?
I actually went the other way. The original Mk I and Mk II used a 50# refrigerant recovery tank, but I built the recovery tanks for the Lil Terp and the Mk III. I went back to using a 50# refrigerant recovery tank on the Mk IIIA, because it is not only cheaper, but has more surface area and condenses the butane vapors more rapidly.
Hey GW, just to confirm here: you need liquid butane to go into the column, right? With your original MKIII diagrams I see that there were 2 standpipes: the in (recovery line) was short, and the out was long (which would draw the liquid butane from the bottom of the tank). How would this work with a normal 30# or 50# recovery tank? Doesn't it only have one valve that's on top? Or do you need to add something to it to get the long standpipe for the output?
Nevermind, answered my own question. There are connectors on most storage tanks: One VAPOR Connection (BLUE) & One Liquid Connection (RED). I assume since you mentioned that you're only using 4 pounds of butane that we could get away with a 15 pound or 30 pound tank?
We use a 50# tank with 4 to 5 pounds of butane in it, so as to maximize internal condensation surfaces, to cool down the incoming compressed butane. When Sean tried to run his Mk II with a 80% fill on a 50# tank, his recovery time was dramatically increased. When Mk IIIA owner X, purchased a 30# tank, instead of a 50# tank, his recovery time was also significantly increased. Besides storage, what is happening in the tank, is that you are getting rid of the heat applied to the butane from the hot soup pot, and from the added heat of compression, so that the vapors once again become liquid.
The long 1/4" tube to the bottom of the collection tank, is the down tube from the top of the column. That is to minimize splashing and liquid being pulled directly into the adjacent pump port. The 3/8" port, that only penetrates the lid, is the one that you will be pumping vapors from.
Yup - thanks. I was referring to the storage tank, but your points make sense. Quite conveniently a 12 pack of the butane canisters is $50 and contains 4.4lb of butane, so we'll probably go with that. I'm trying to put together all the parts now so just making sure :-) Thanks again!
Ohmmmmmmmmmmmmmmmmmmmm!!!1
Howdy, I have been following your site since April. You guys are really paving the way in extractions and have come along way since that short period of time! Thank-you for all the valuable information, it helps more than you know. I am pretty mechanically inclined and very close to building a passive Terpenator using your plans from the Mk III. I can always add a pump later. I am building this with the intent to perform better quality "no contaminants" and less costly extractions when complete. My patients will love it! However, I will also need to have the machining/welding farmed out. So on to my question. Would Specialized Formulations sell and ship the Mk III lid assemblies by themselves in lue of the whole kit? If so, it would be another great option for individuals who feel competent to save even more money and take the hassle out of finding a shop to do the work and do it right. What do you think? Regards, Ryan
Specialized Formulations will have to speak for themselves, so I suggest contacting them and asking at Specializedformulations.com. Last I heard, they were selling either full parts kits, or just the necessary modified parts for those wishing to create a Terpenator of their own design. GW